Monday, September 30, 2013

Zucchini Boats

Last week I kind of cringed when I realized it was about time for me to start dinner. I watch a friend’s daughter while she is at work so my day starts at 5:00 A.M. 3 days a week which can make for an almost torturous long, tired, grumpy day..especially when the rest of the day includes playing taxi for my step children, maid at home, body builder (ha!), and chef.
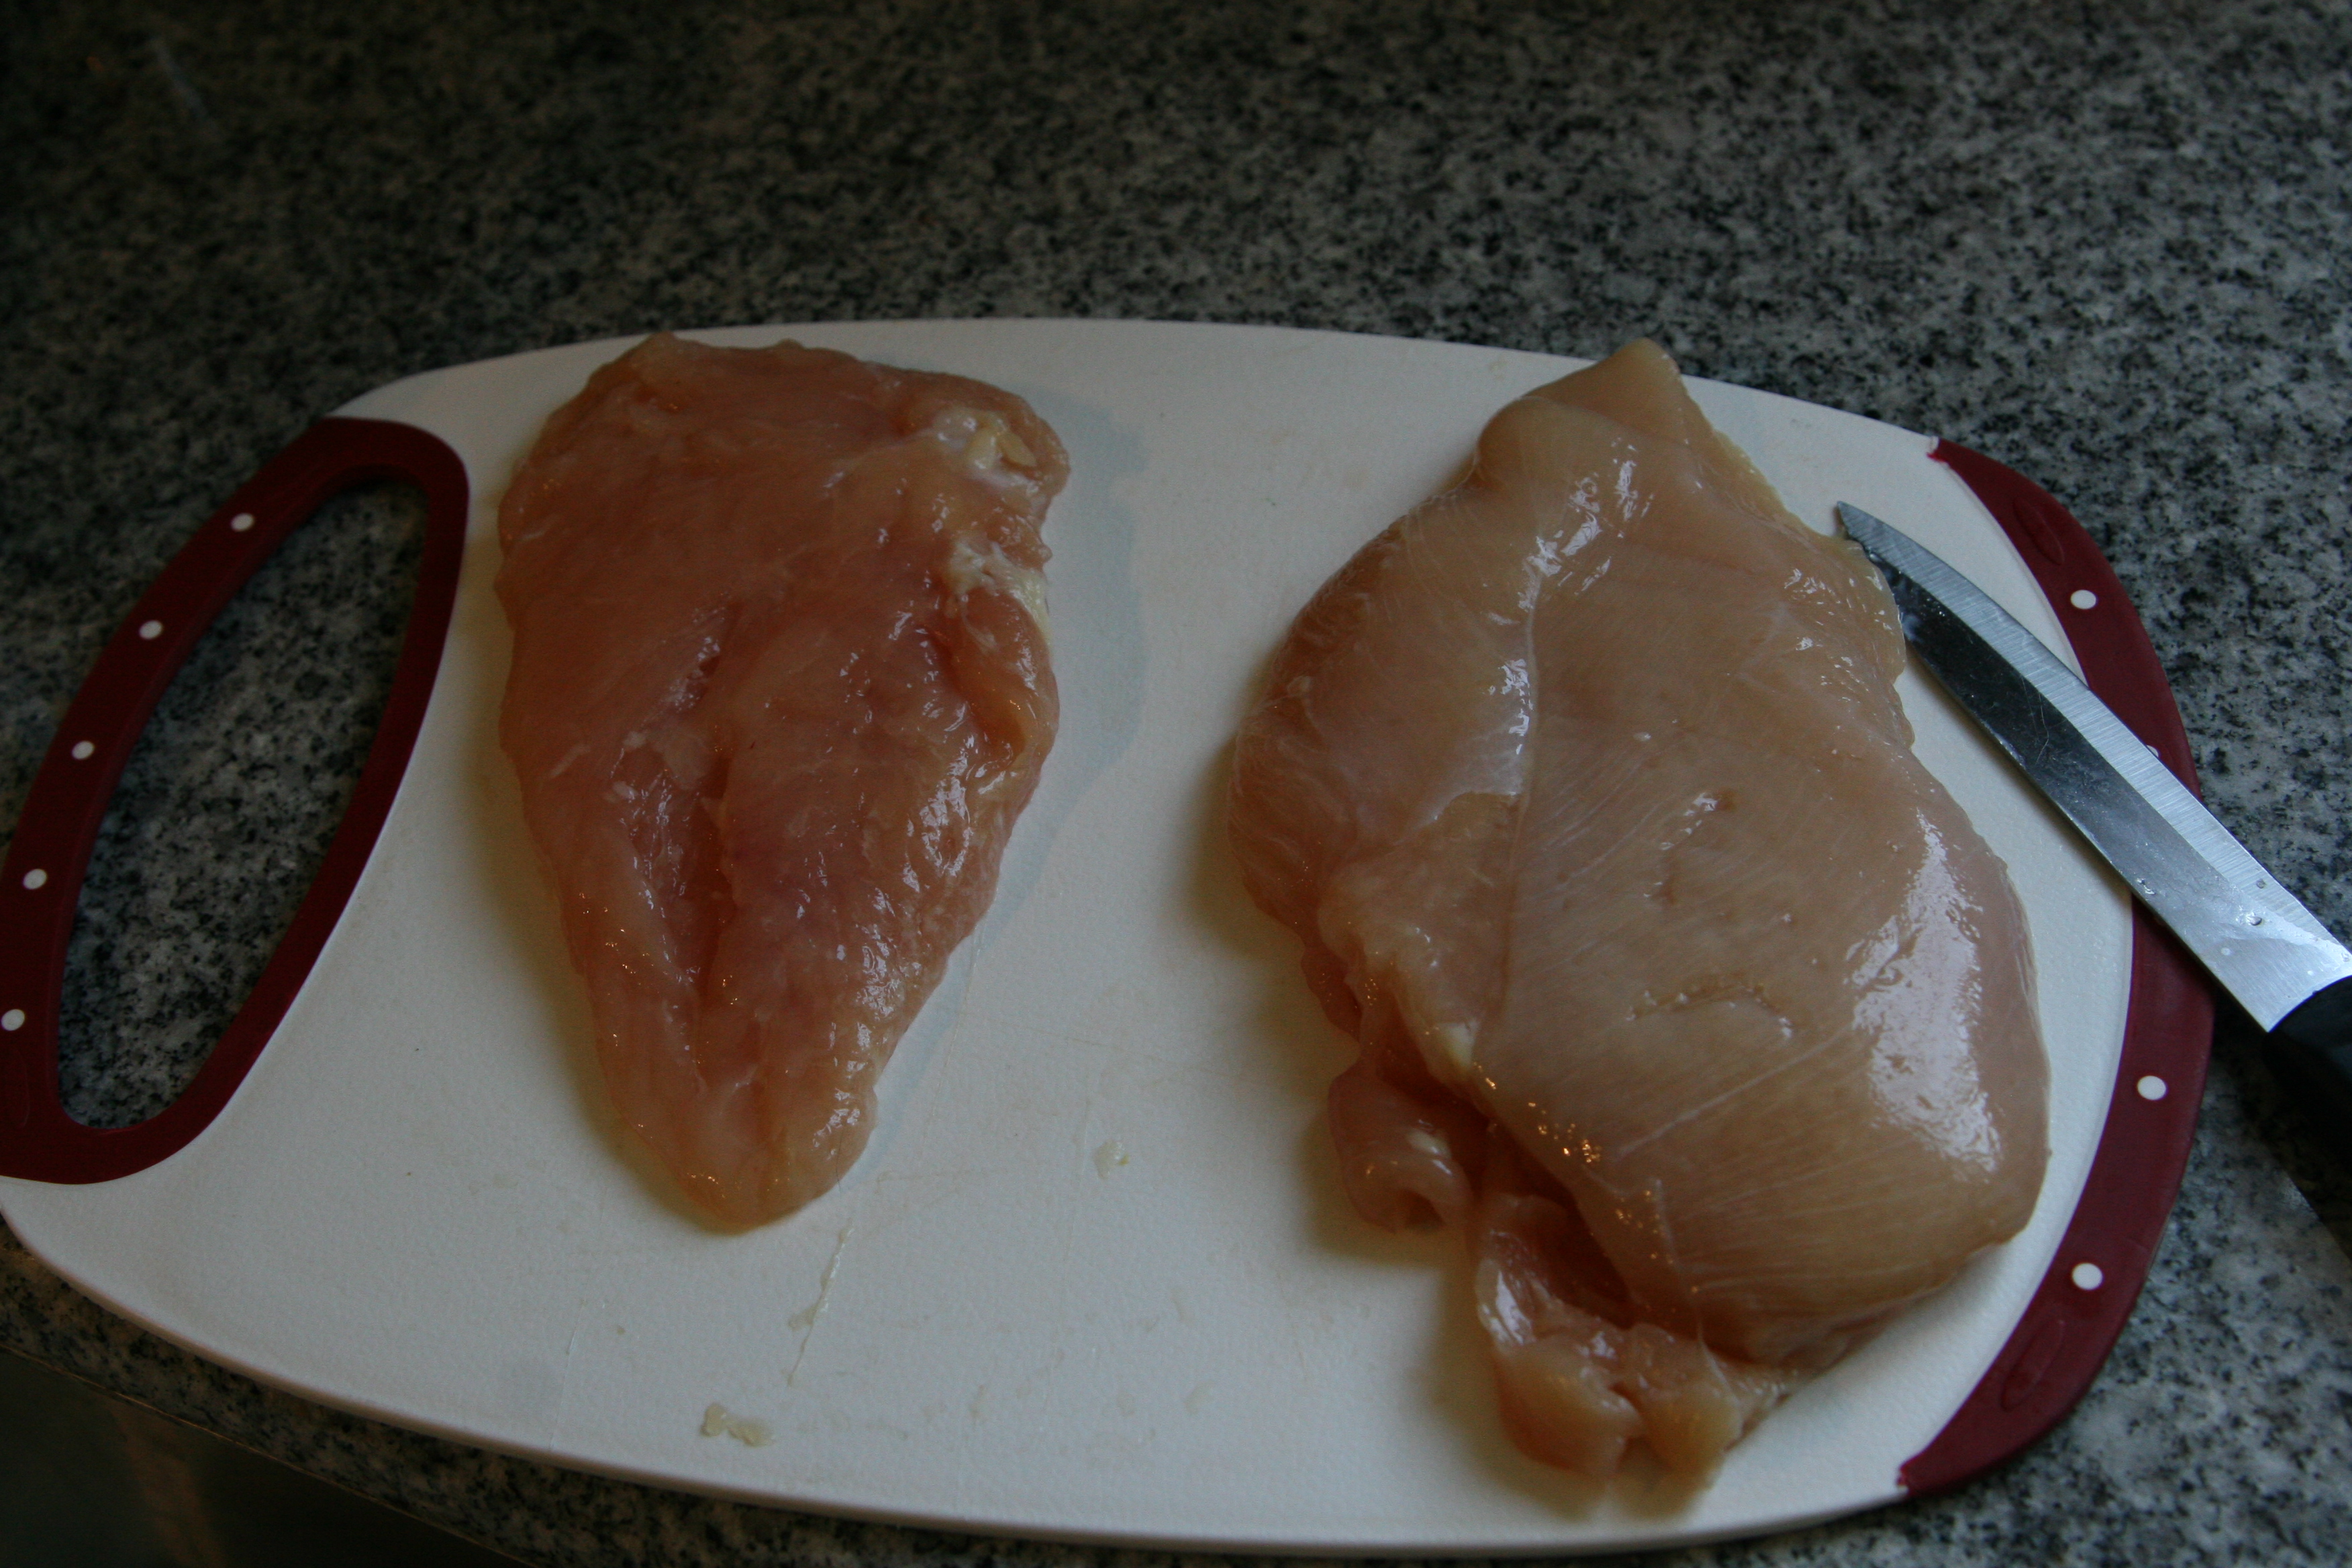
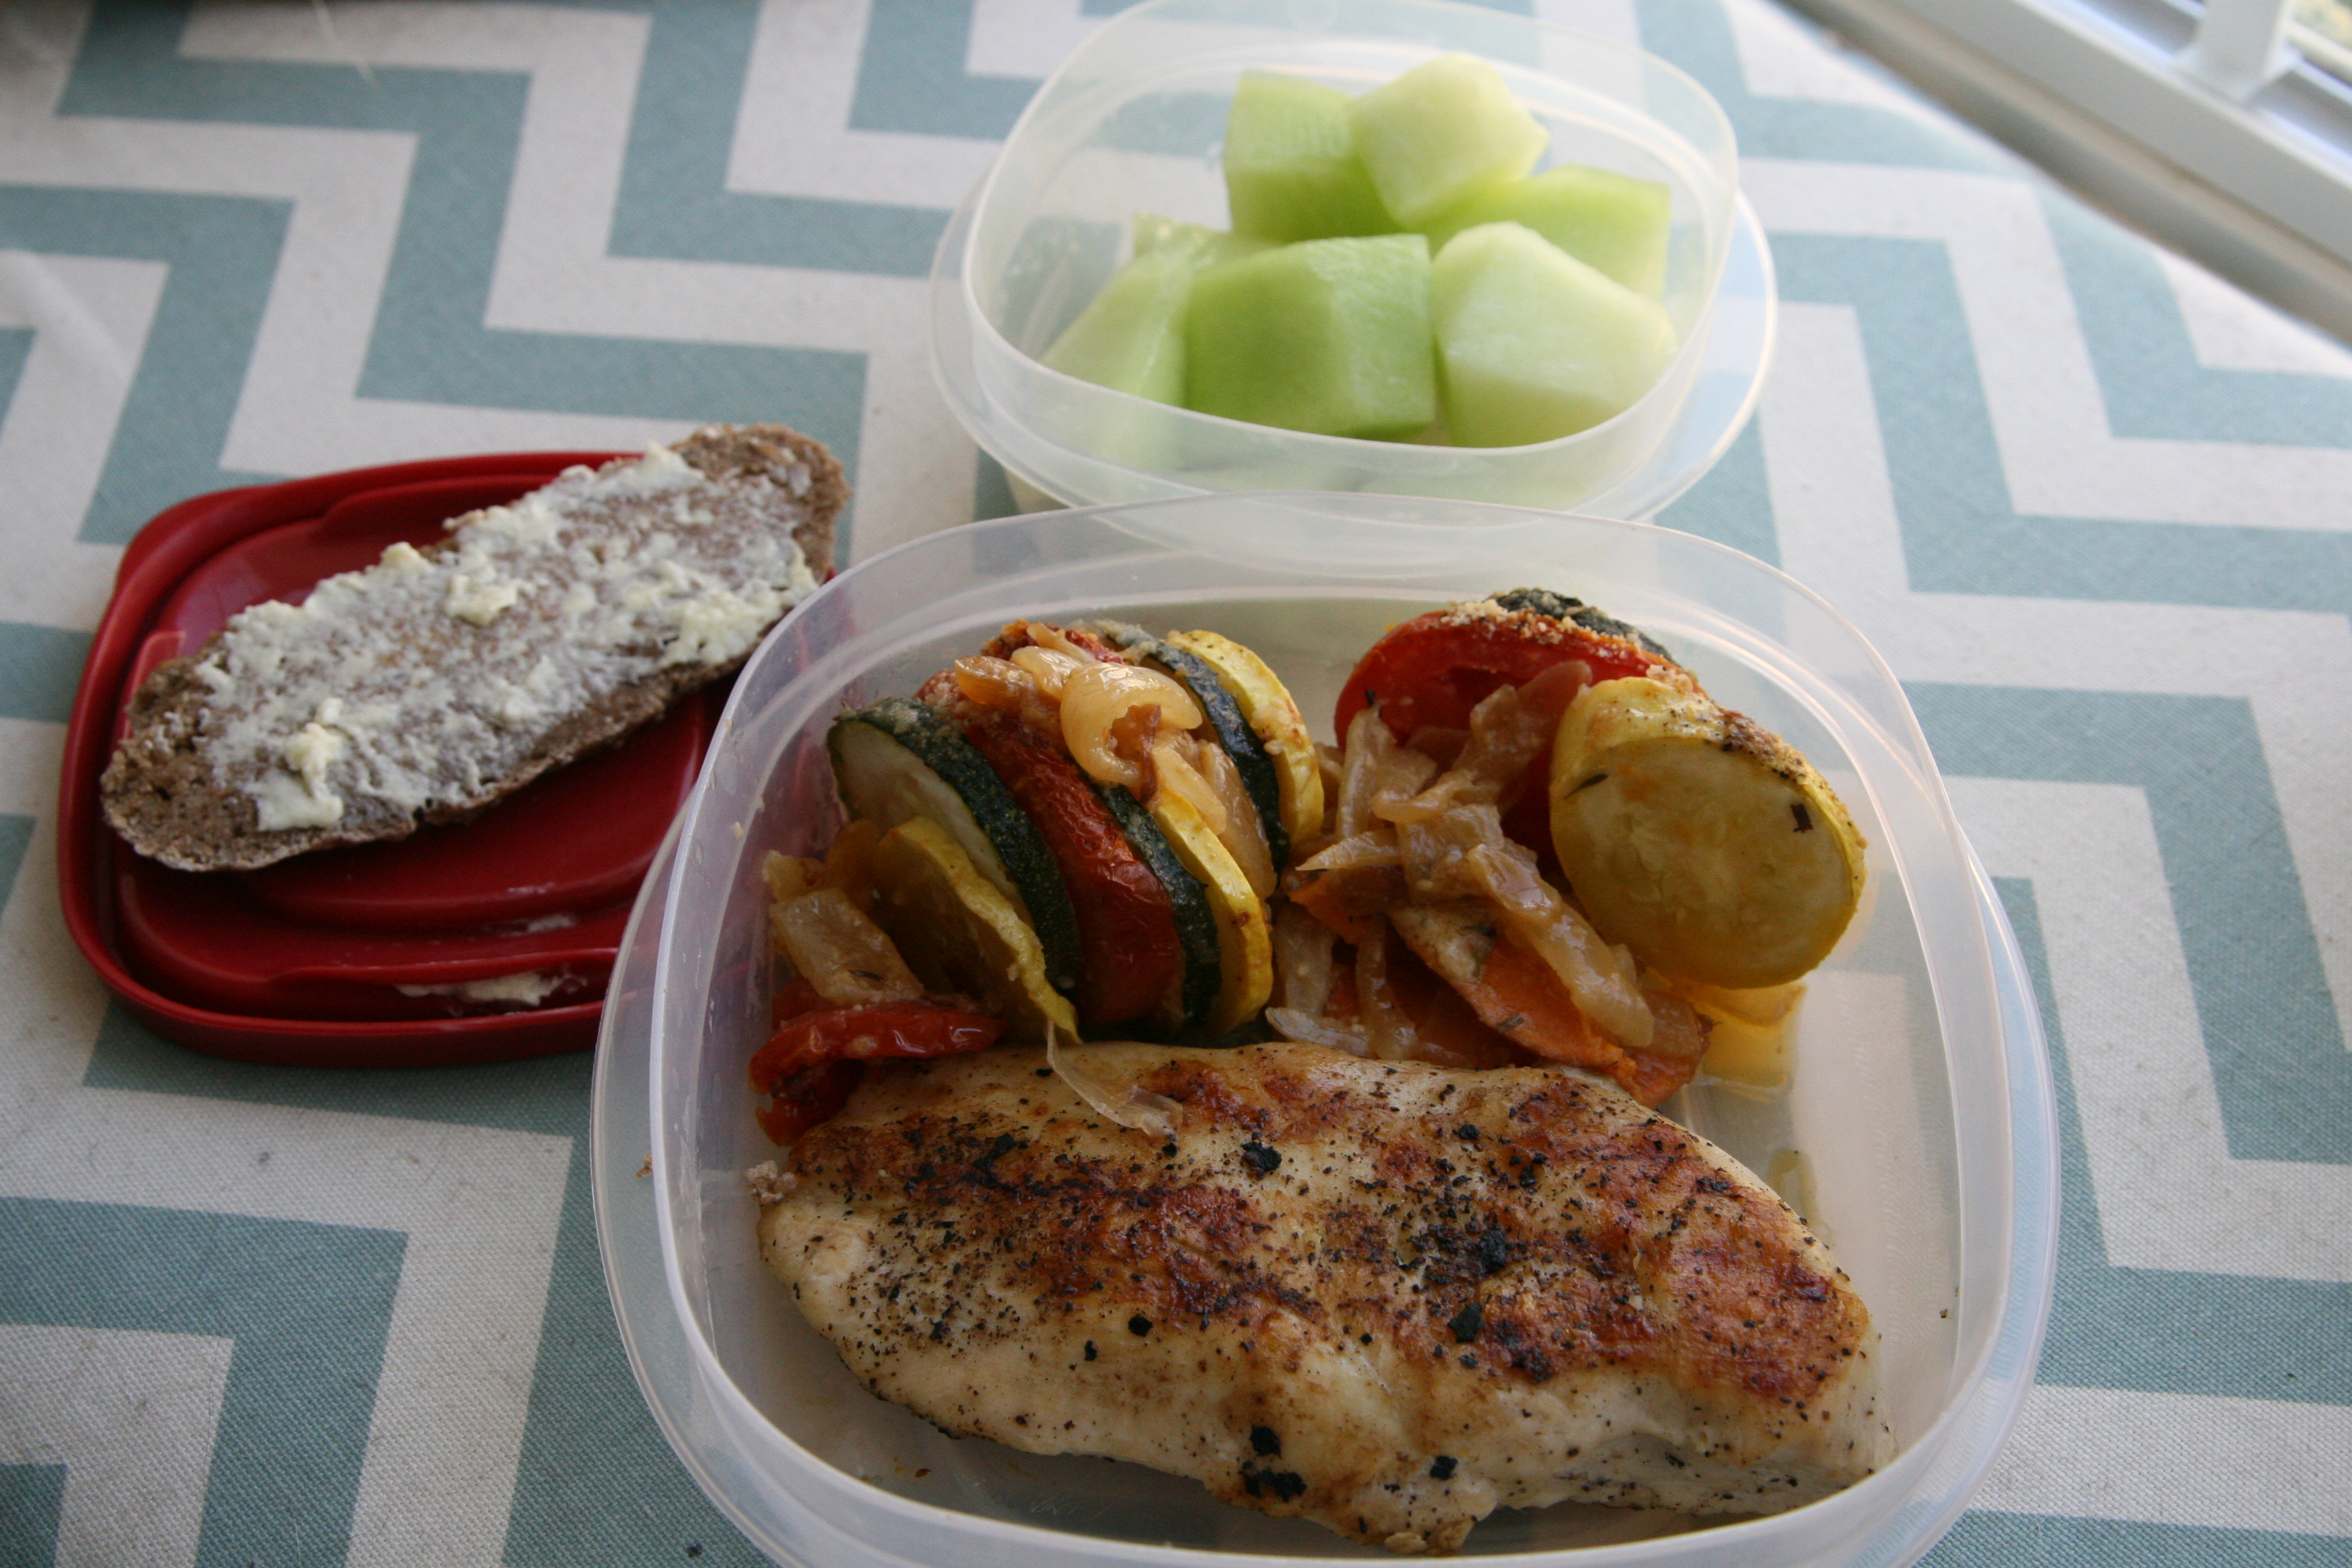
I’m not a chef of any sort, but I would certainly like to think that I know my way around a kitchen. I didn’t have anything planned and needed something put together rather quickly so I grabbed some veggies to base my meal around and ended up grilling up some chicken. But nobody cares about boring old chicken..let me tell you about the zucchini boats I made.
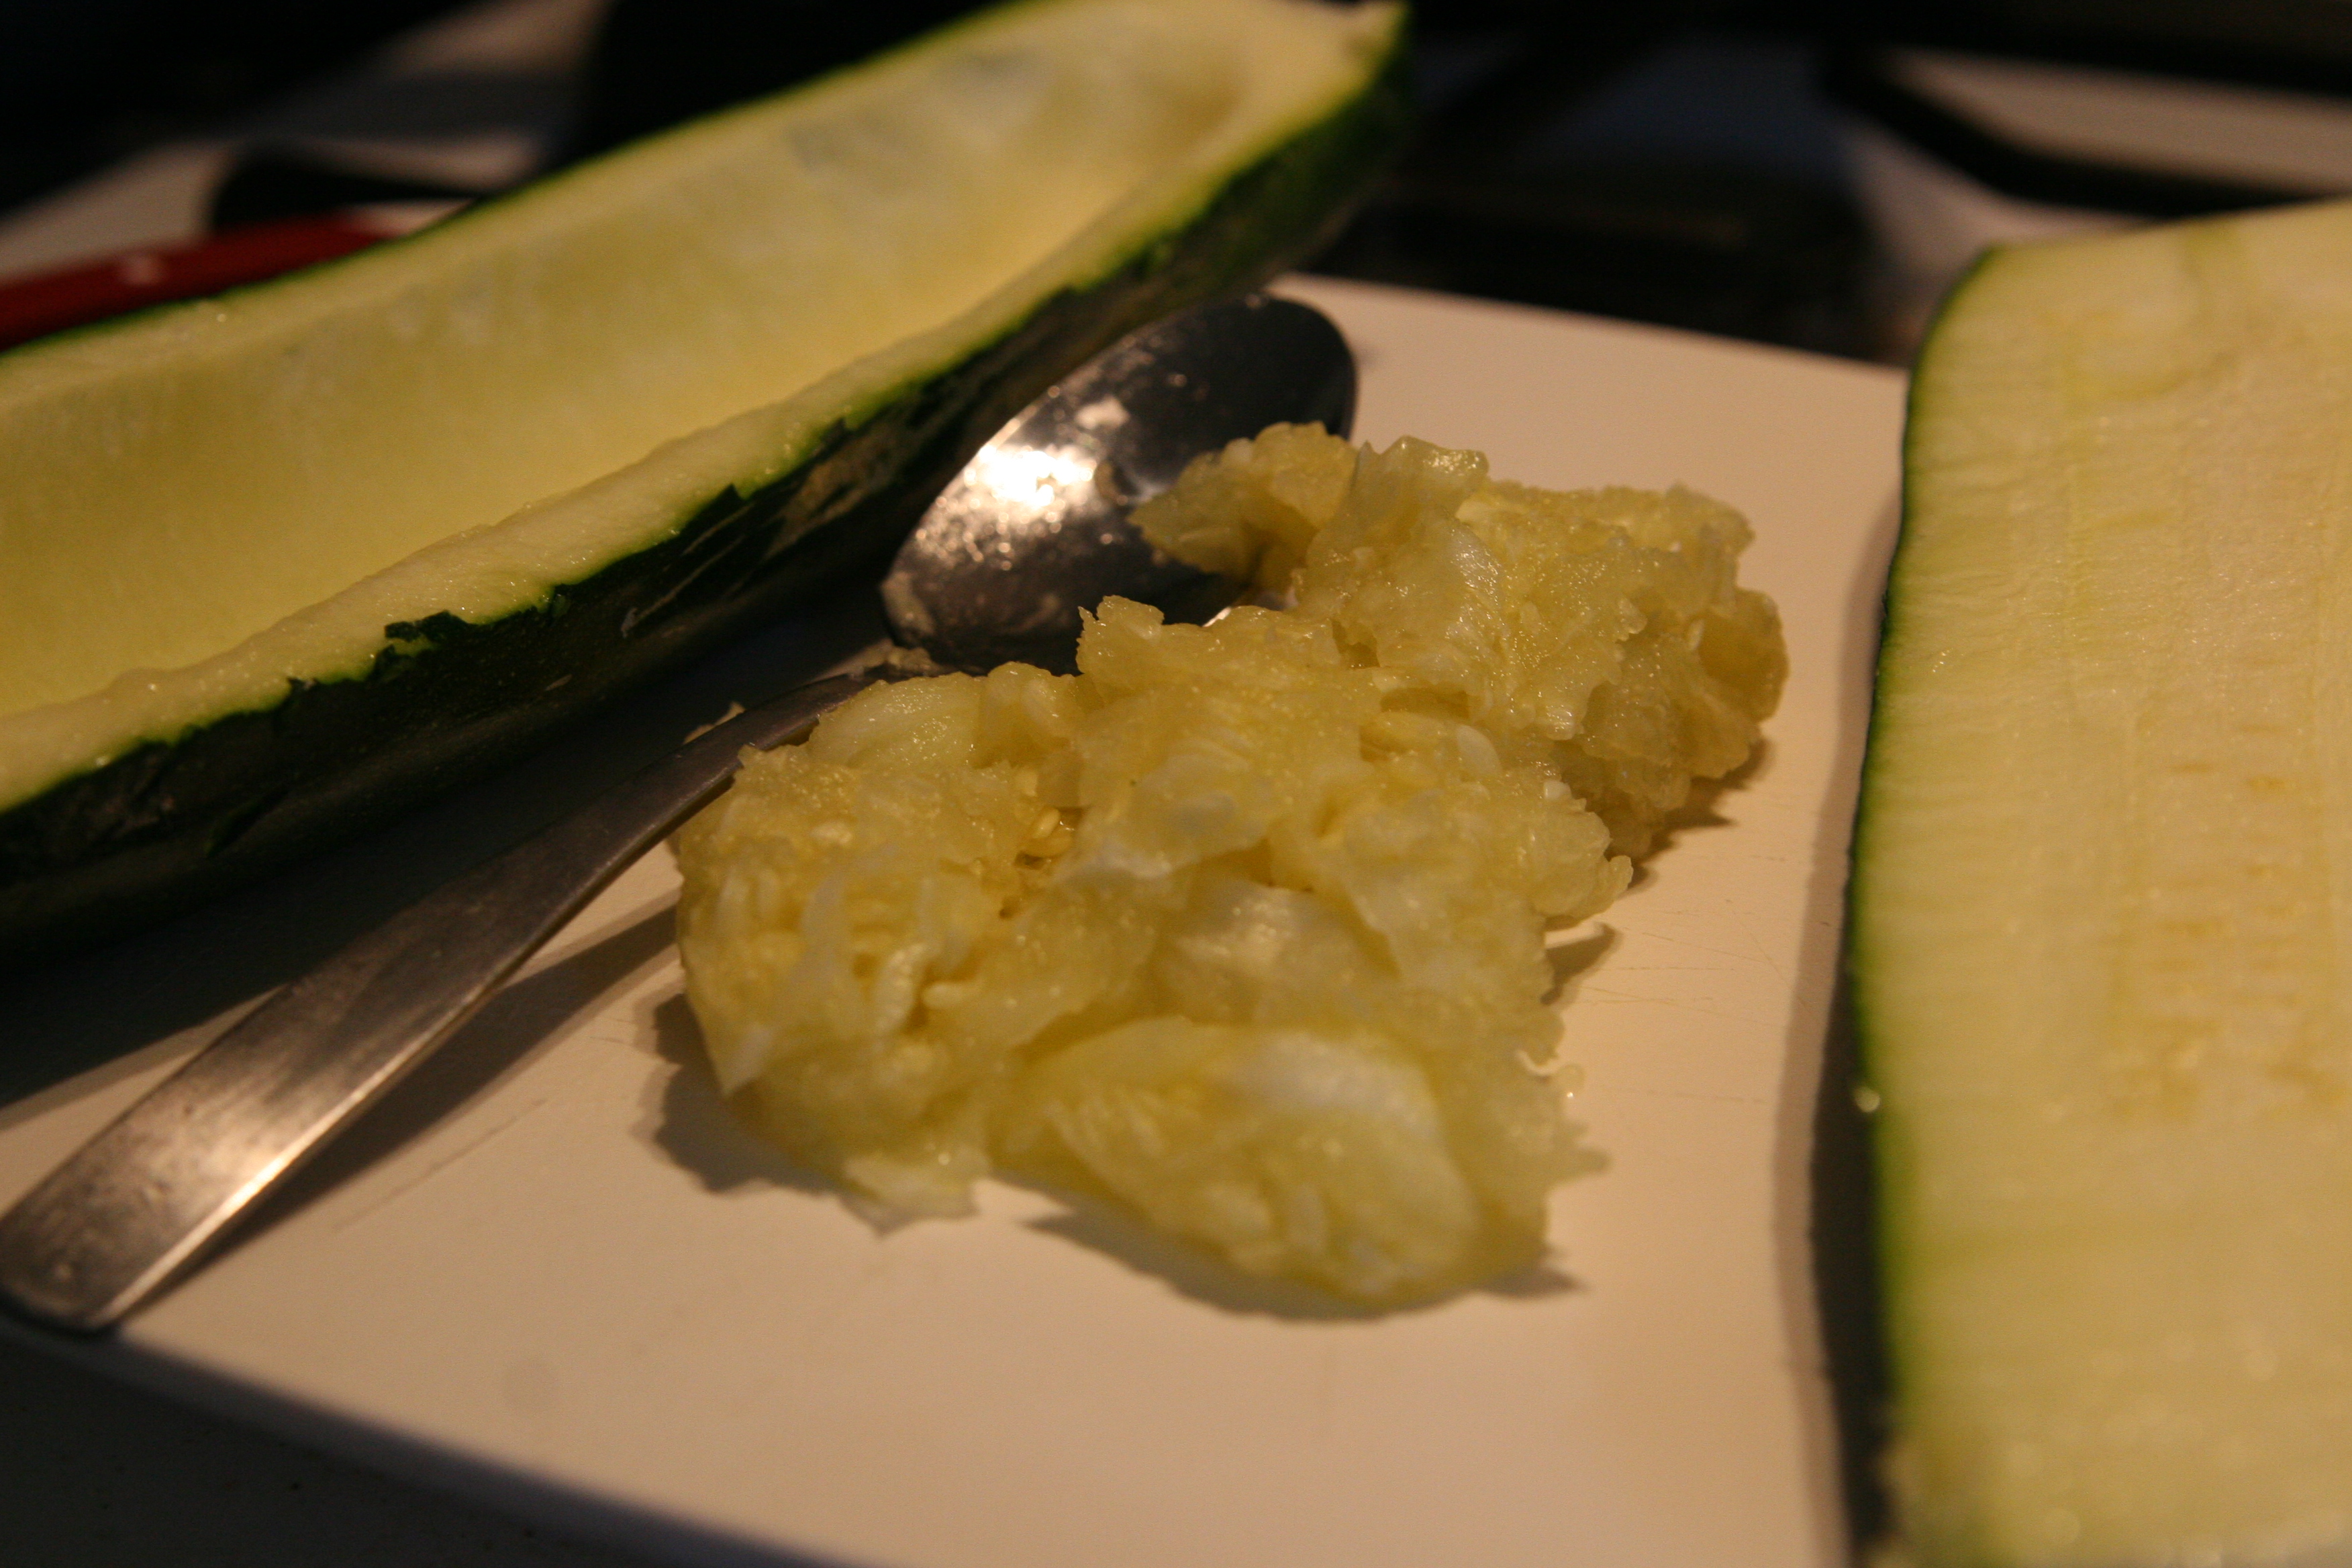
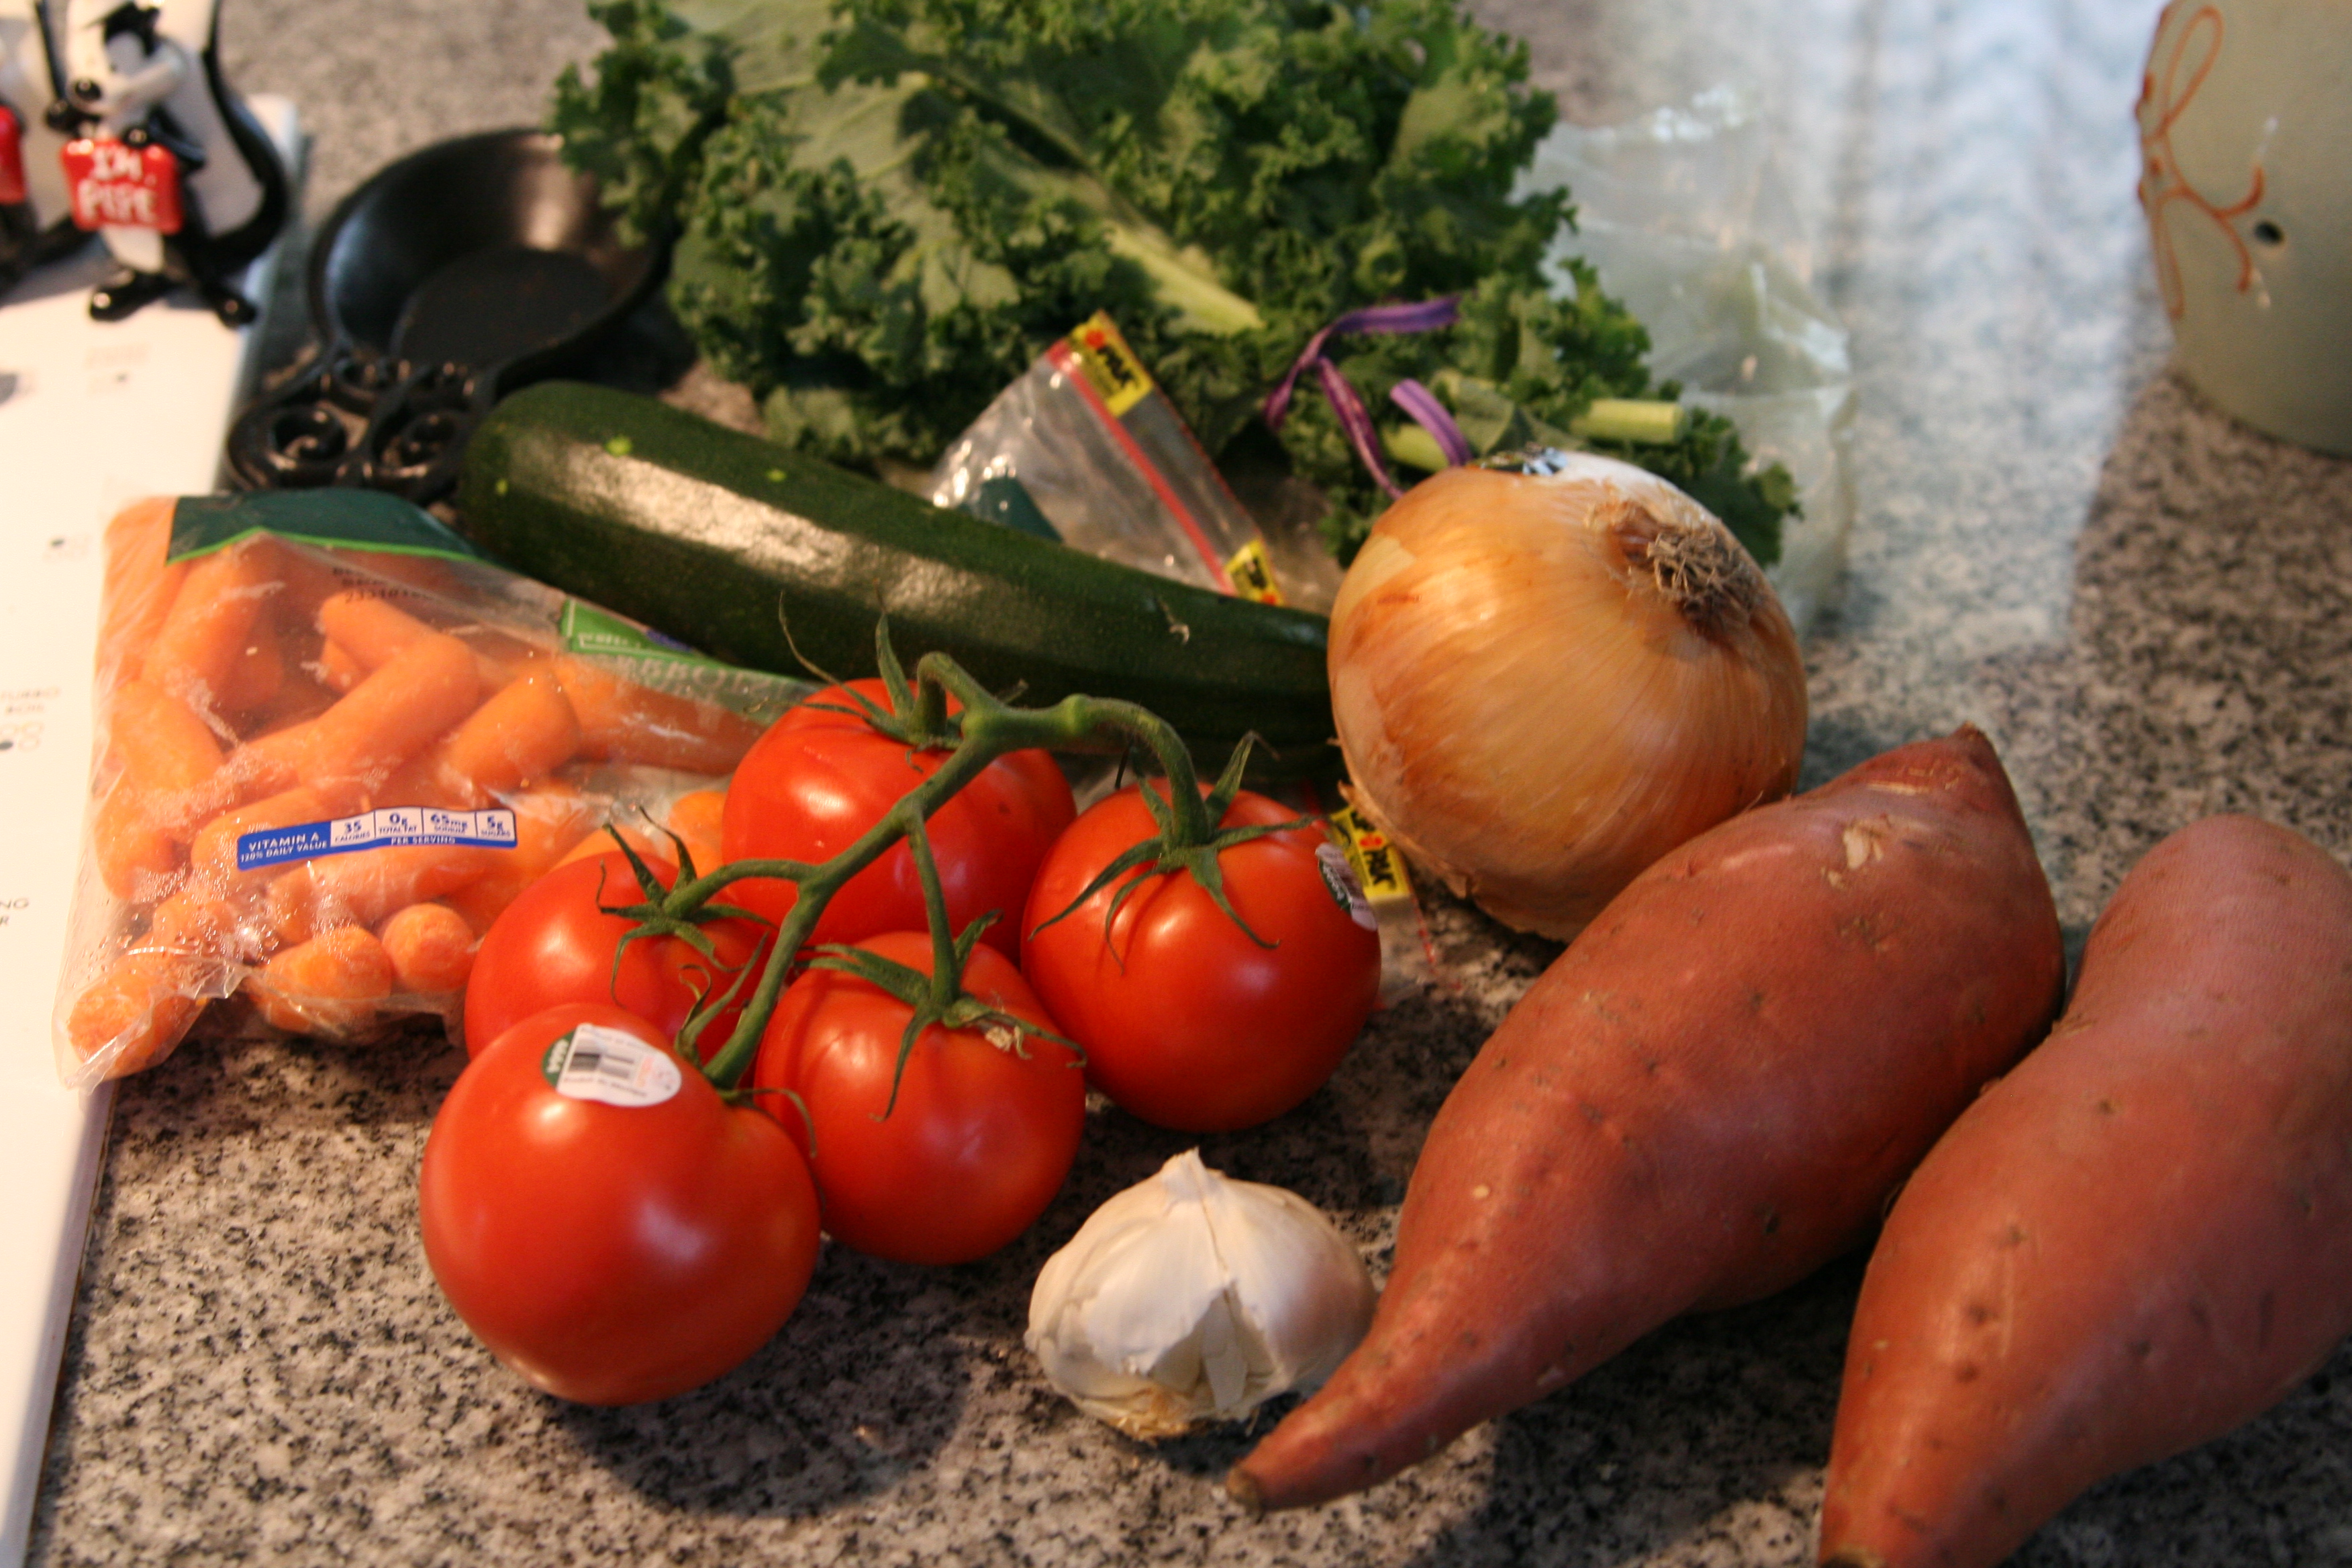
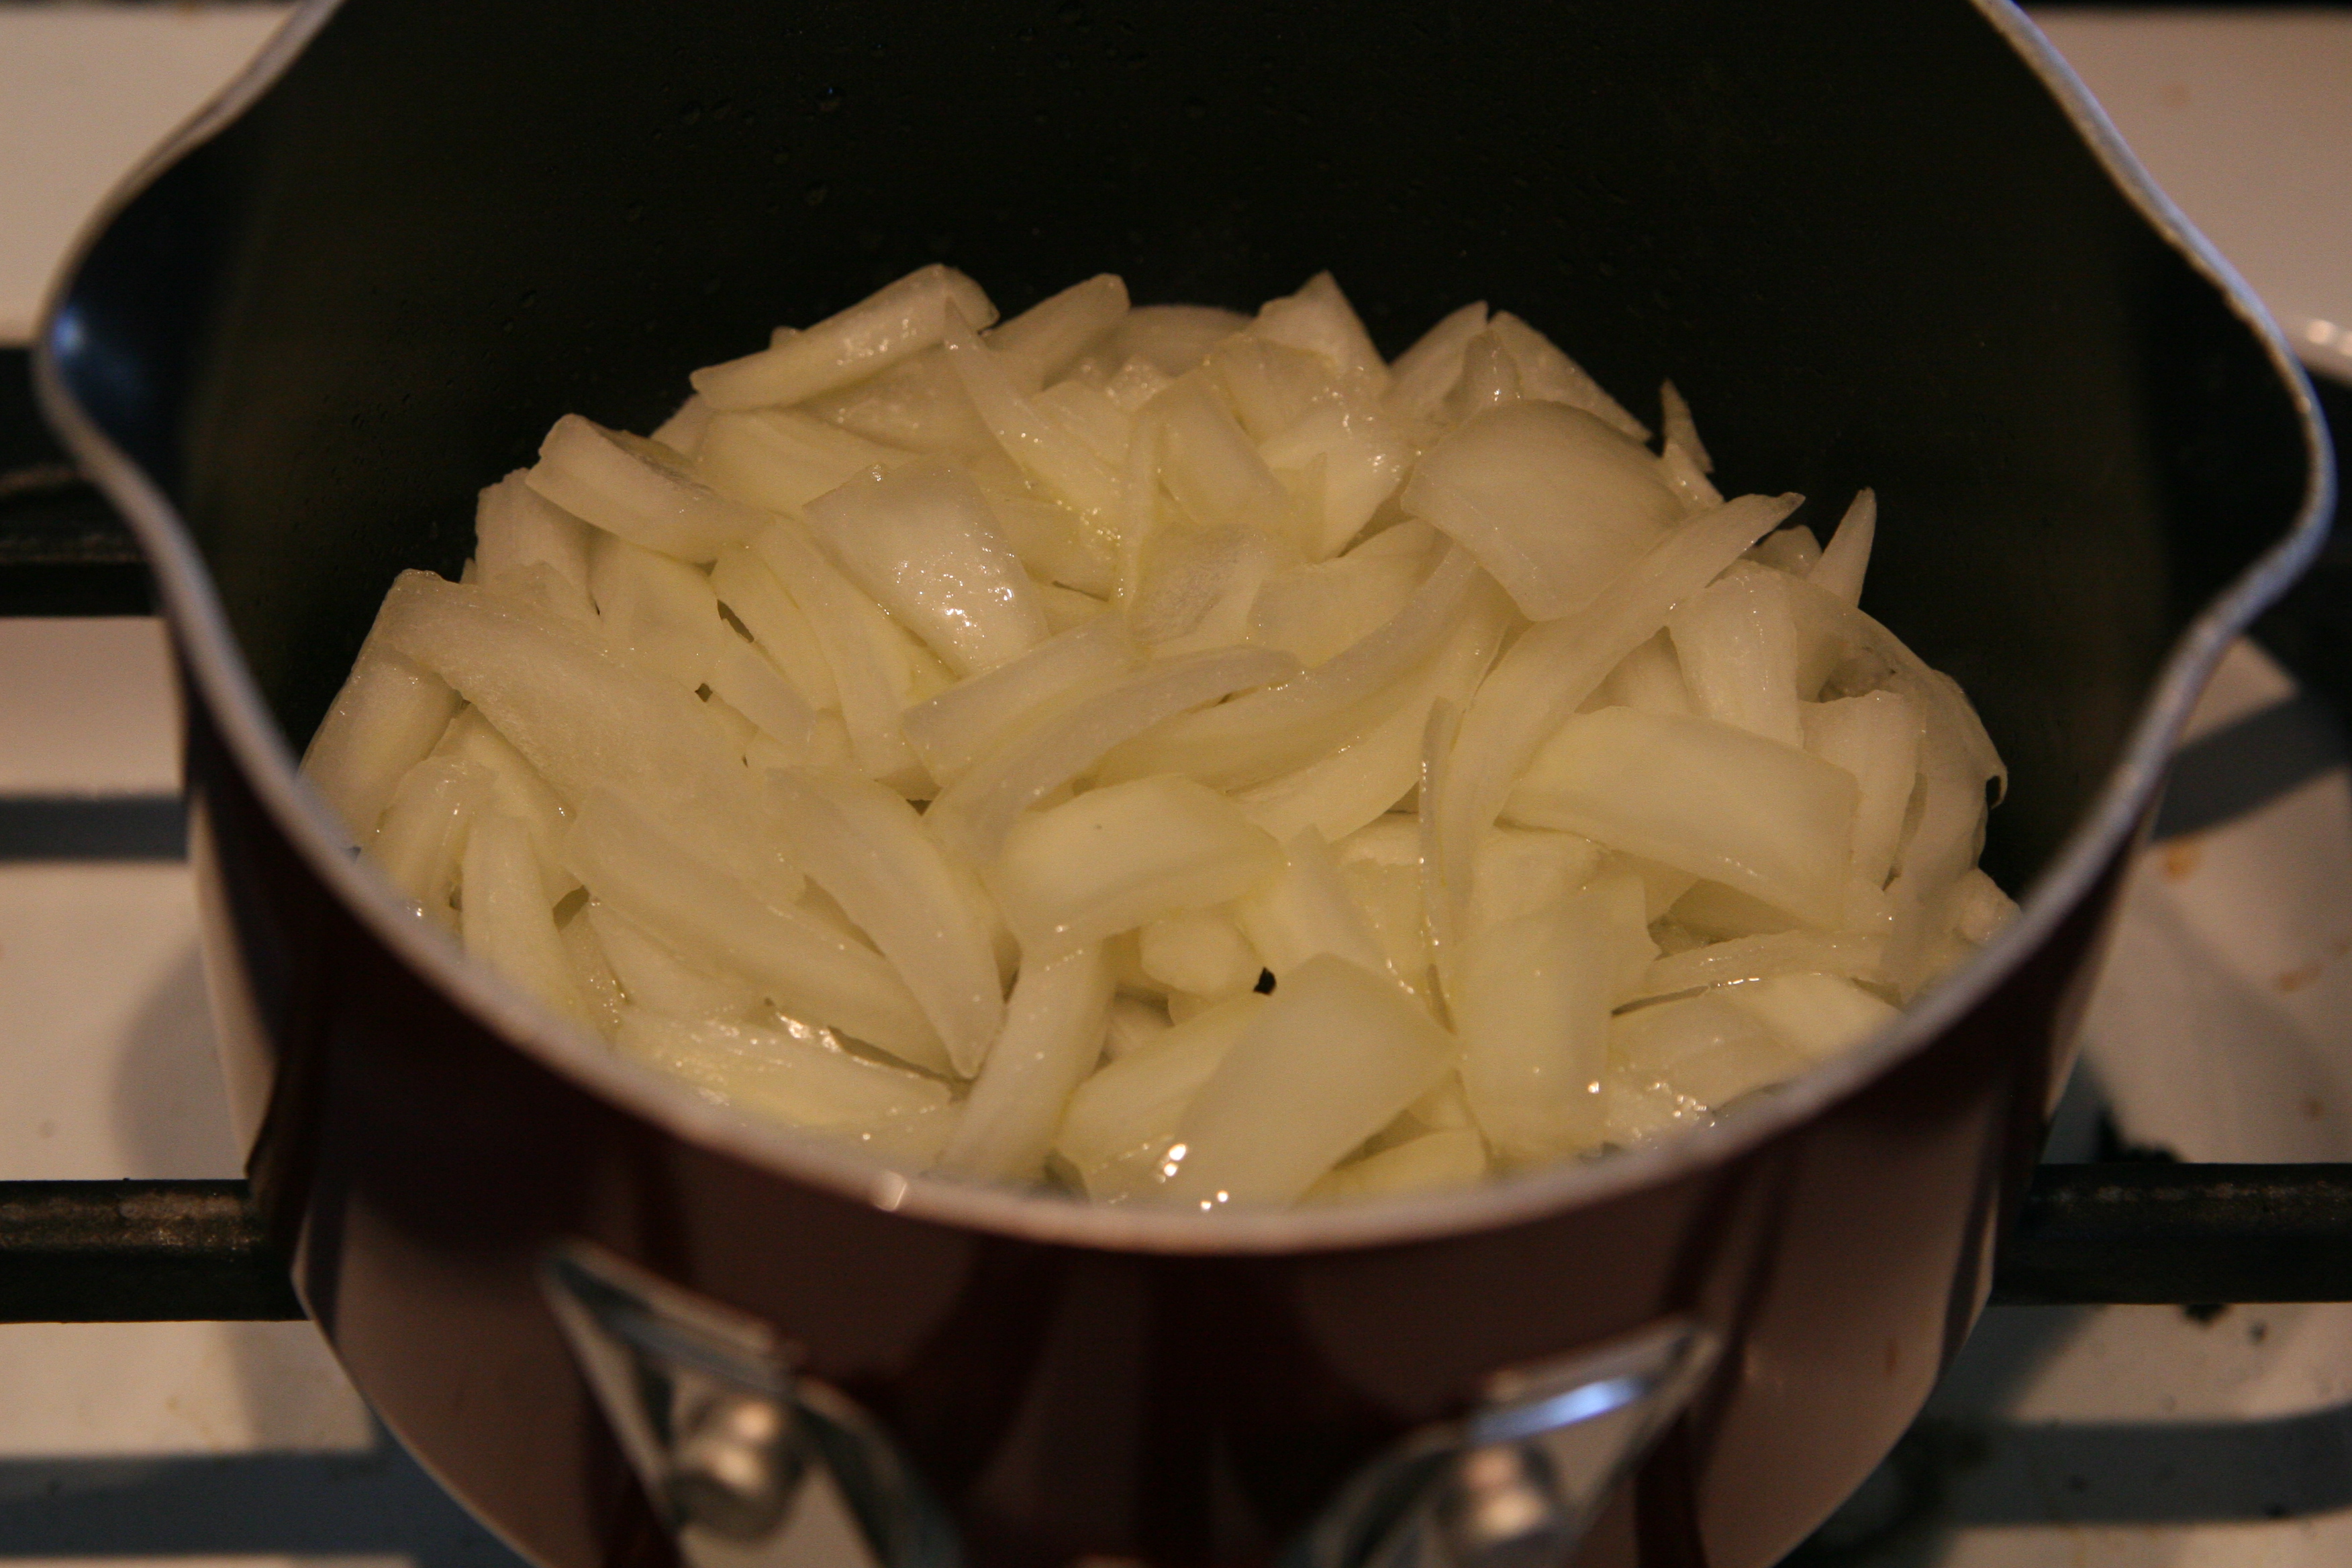
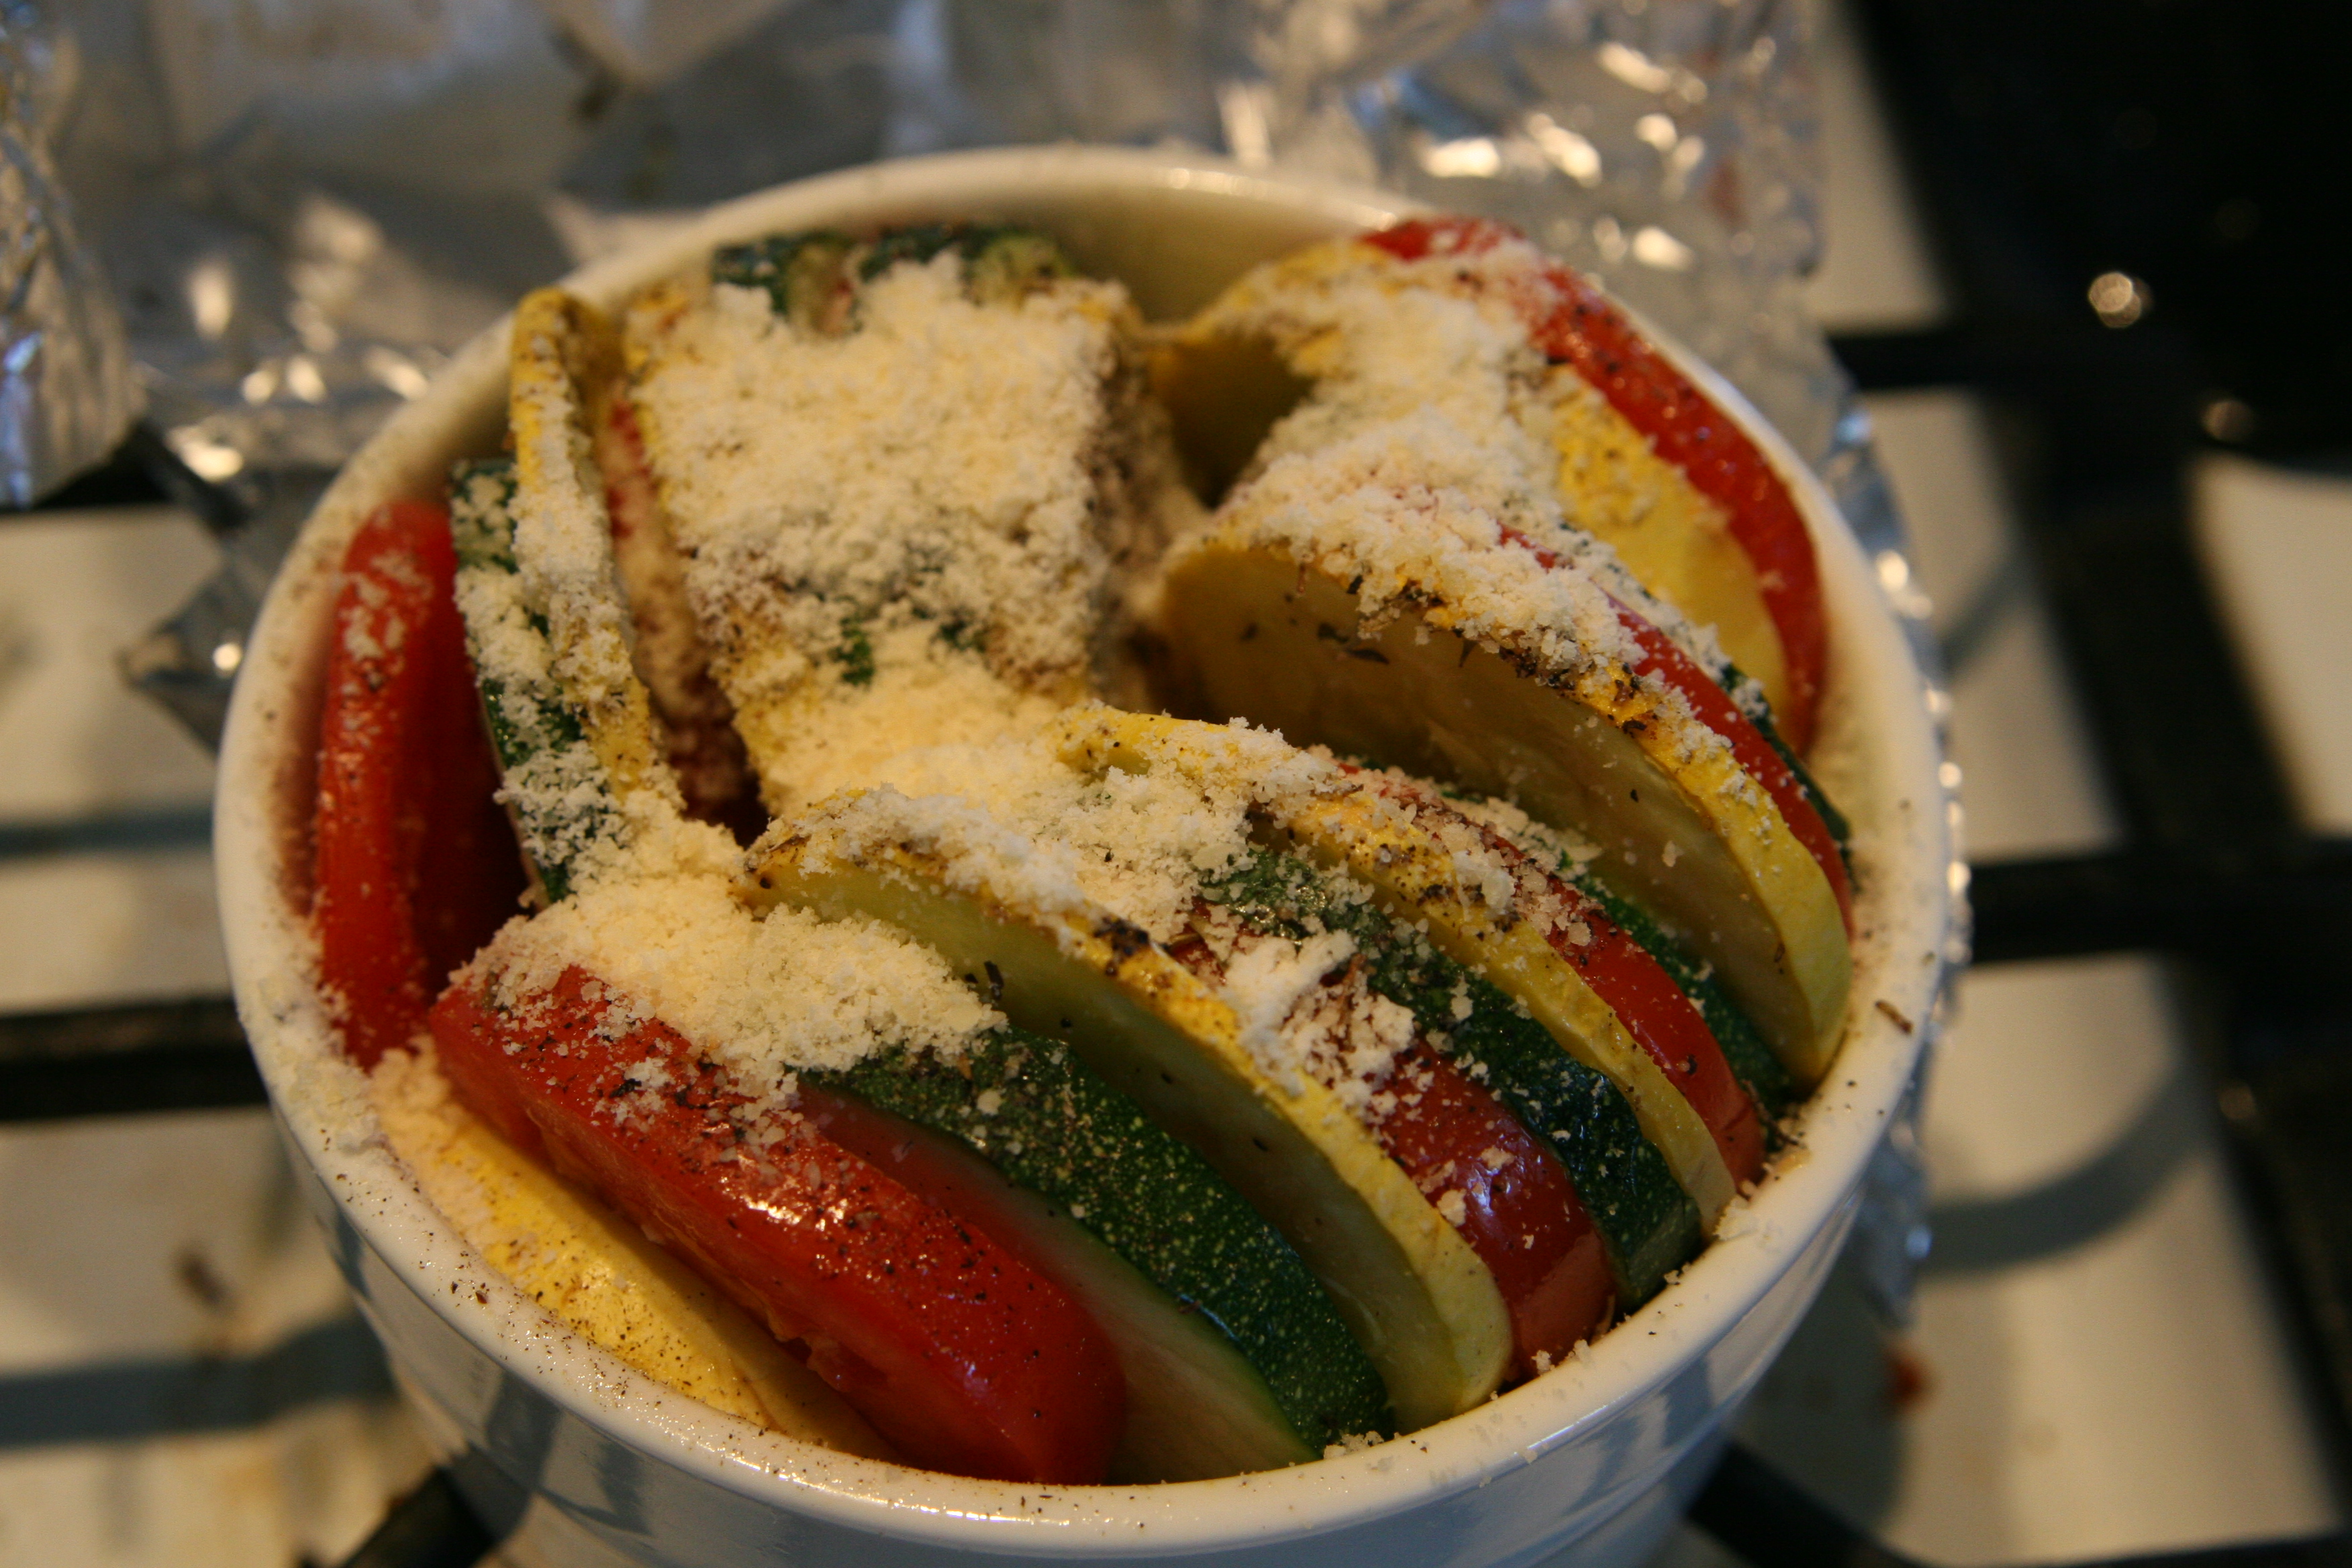
It was just me and the hubby eating the zucchini so I took 1 medium/large one, cleaned it, and sliced the ends off and then cut it in half length wise. I then spooned out the insides leaving about 1/4 of an inch still inside. I took the scoopings and tossed them in a mixing bowl & placed the zucchini “boats” in a baking dish I sprayed with coconut oil and lightly sprayed the zucchini before putting them in the oven at 350 degrees for about 15 minutes.
IMG_2056
While those were in the oven, I took my mixing bowl with the scooping and added:
  • 1 diced medium yellow onion
  • 2-3 diced roma tomatoes
  • 1/4-1/2 cup of spinach
  • 2 cloves of diced garlic
  • 1tbs parsley
  • salt and pepper to taste
and mixed them together.
I had cooked rice in the fridge from earlier, so after laying a thin layer of that in the bottom of my boats I topped them, and surrounded them (you can never have too much tomato, spinach, or onion right?) with the contents of my mixing bowl and topped them with some grated parmesan.
IMG_2059
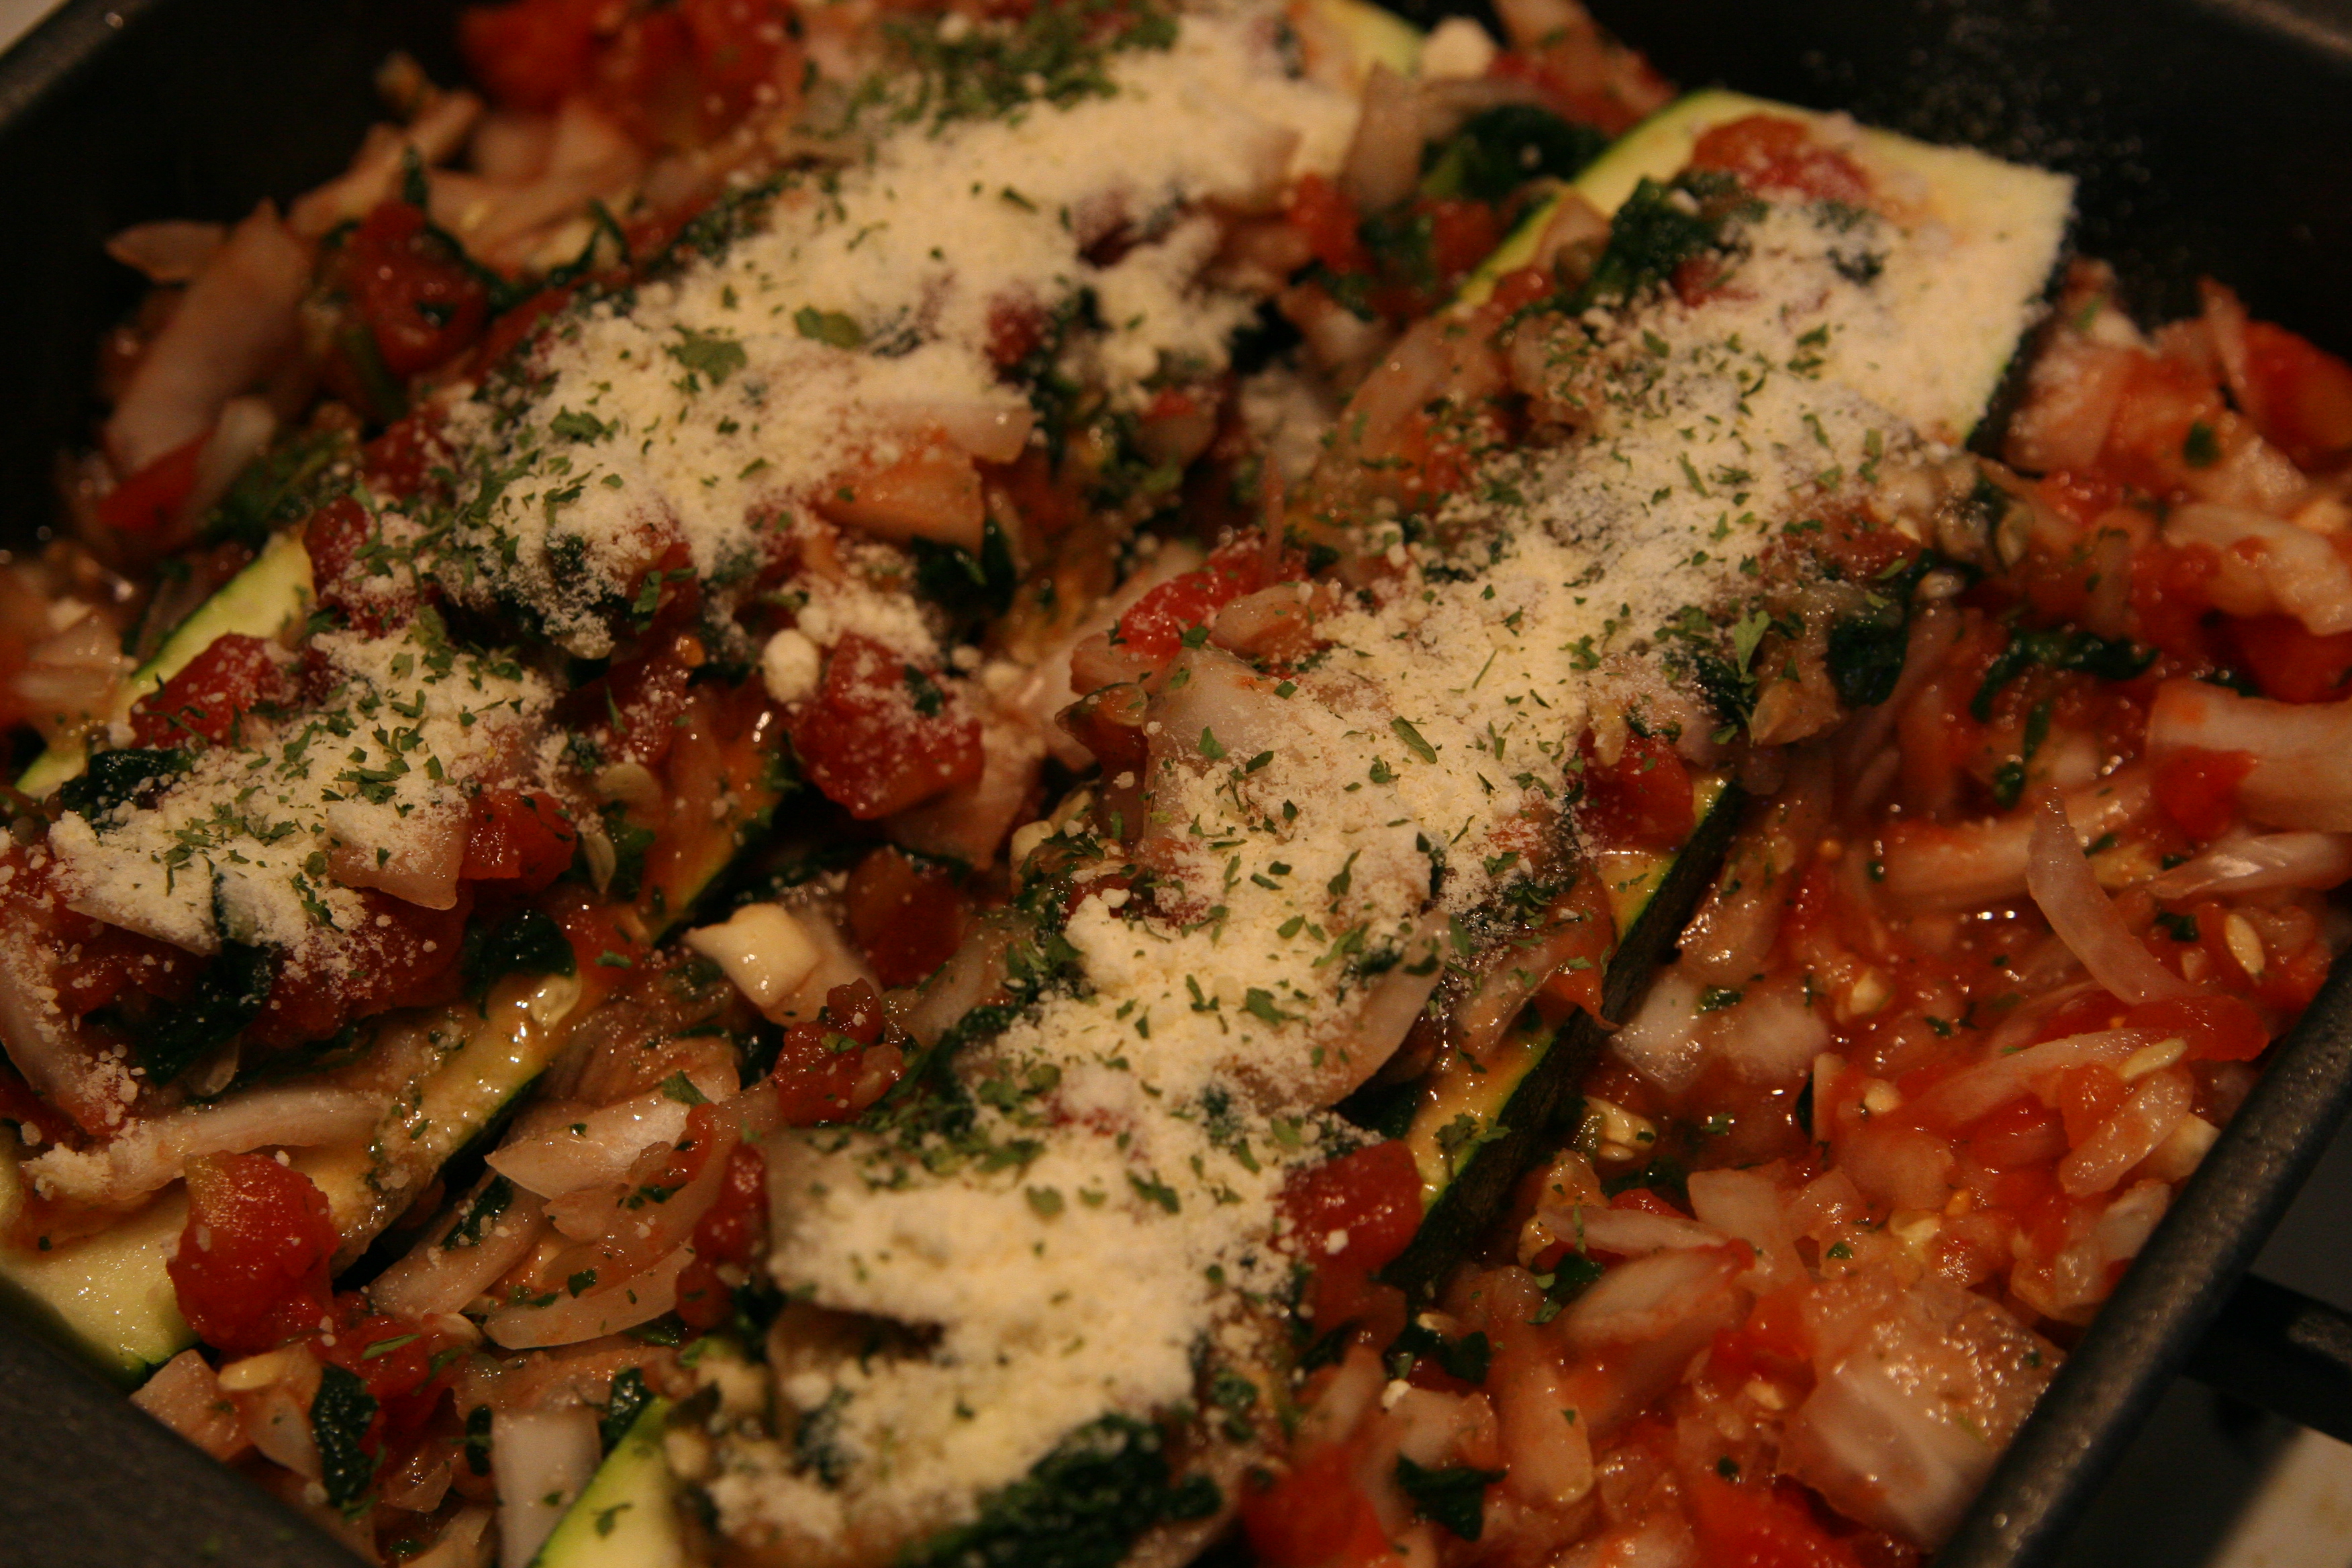
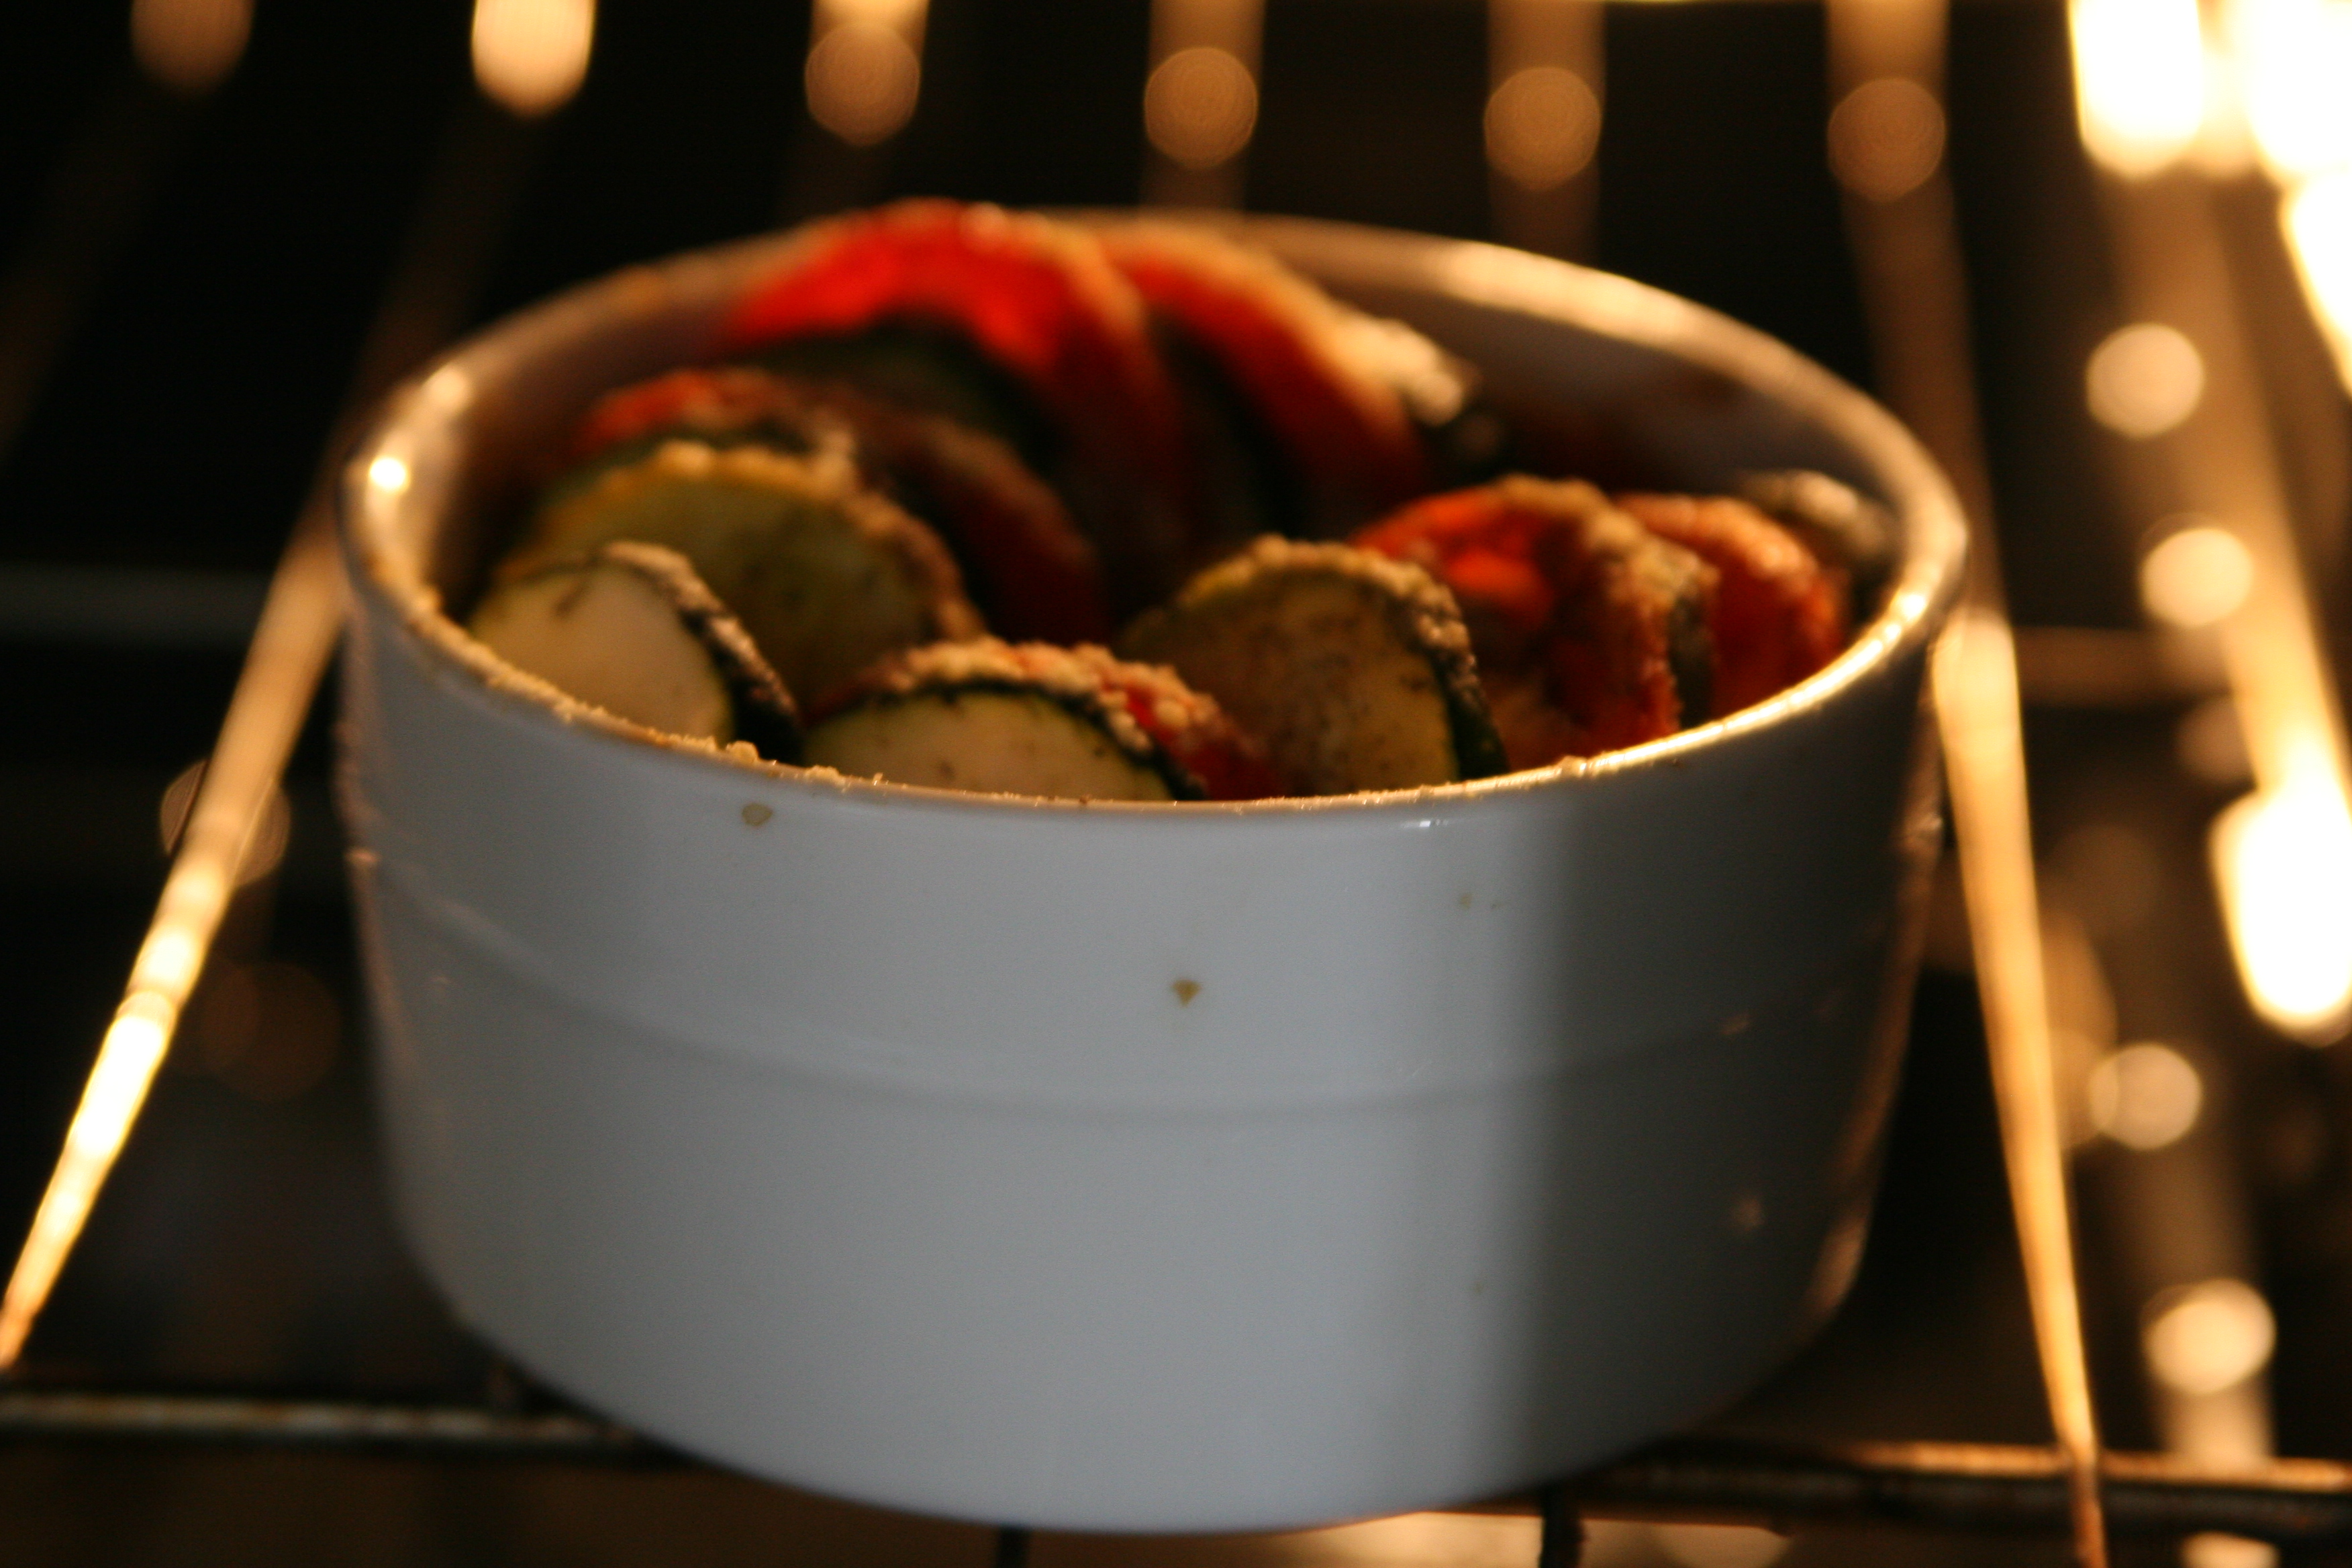
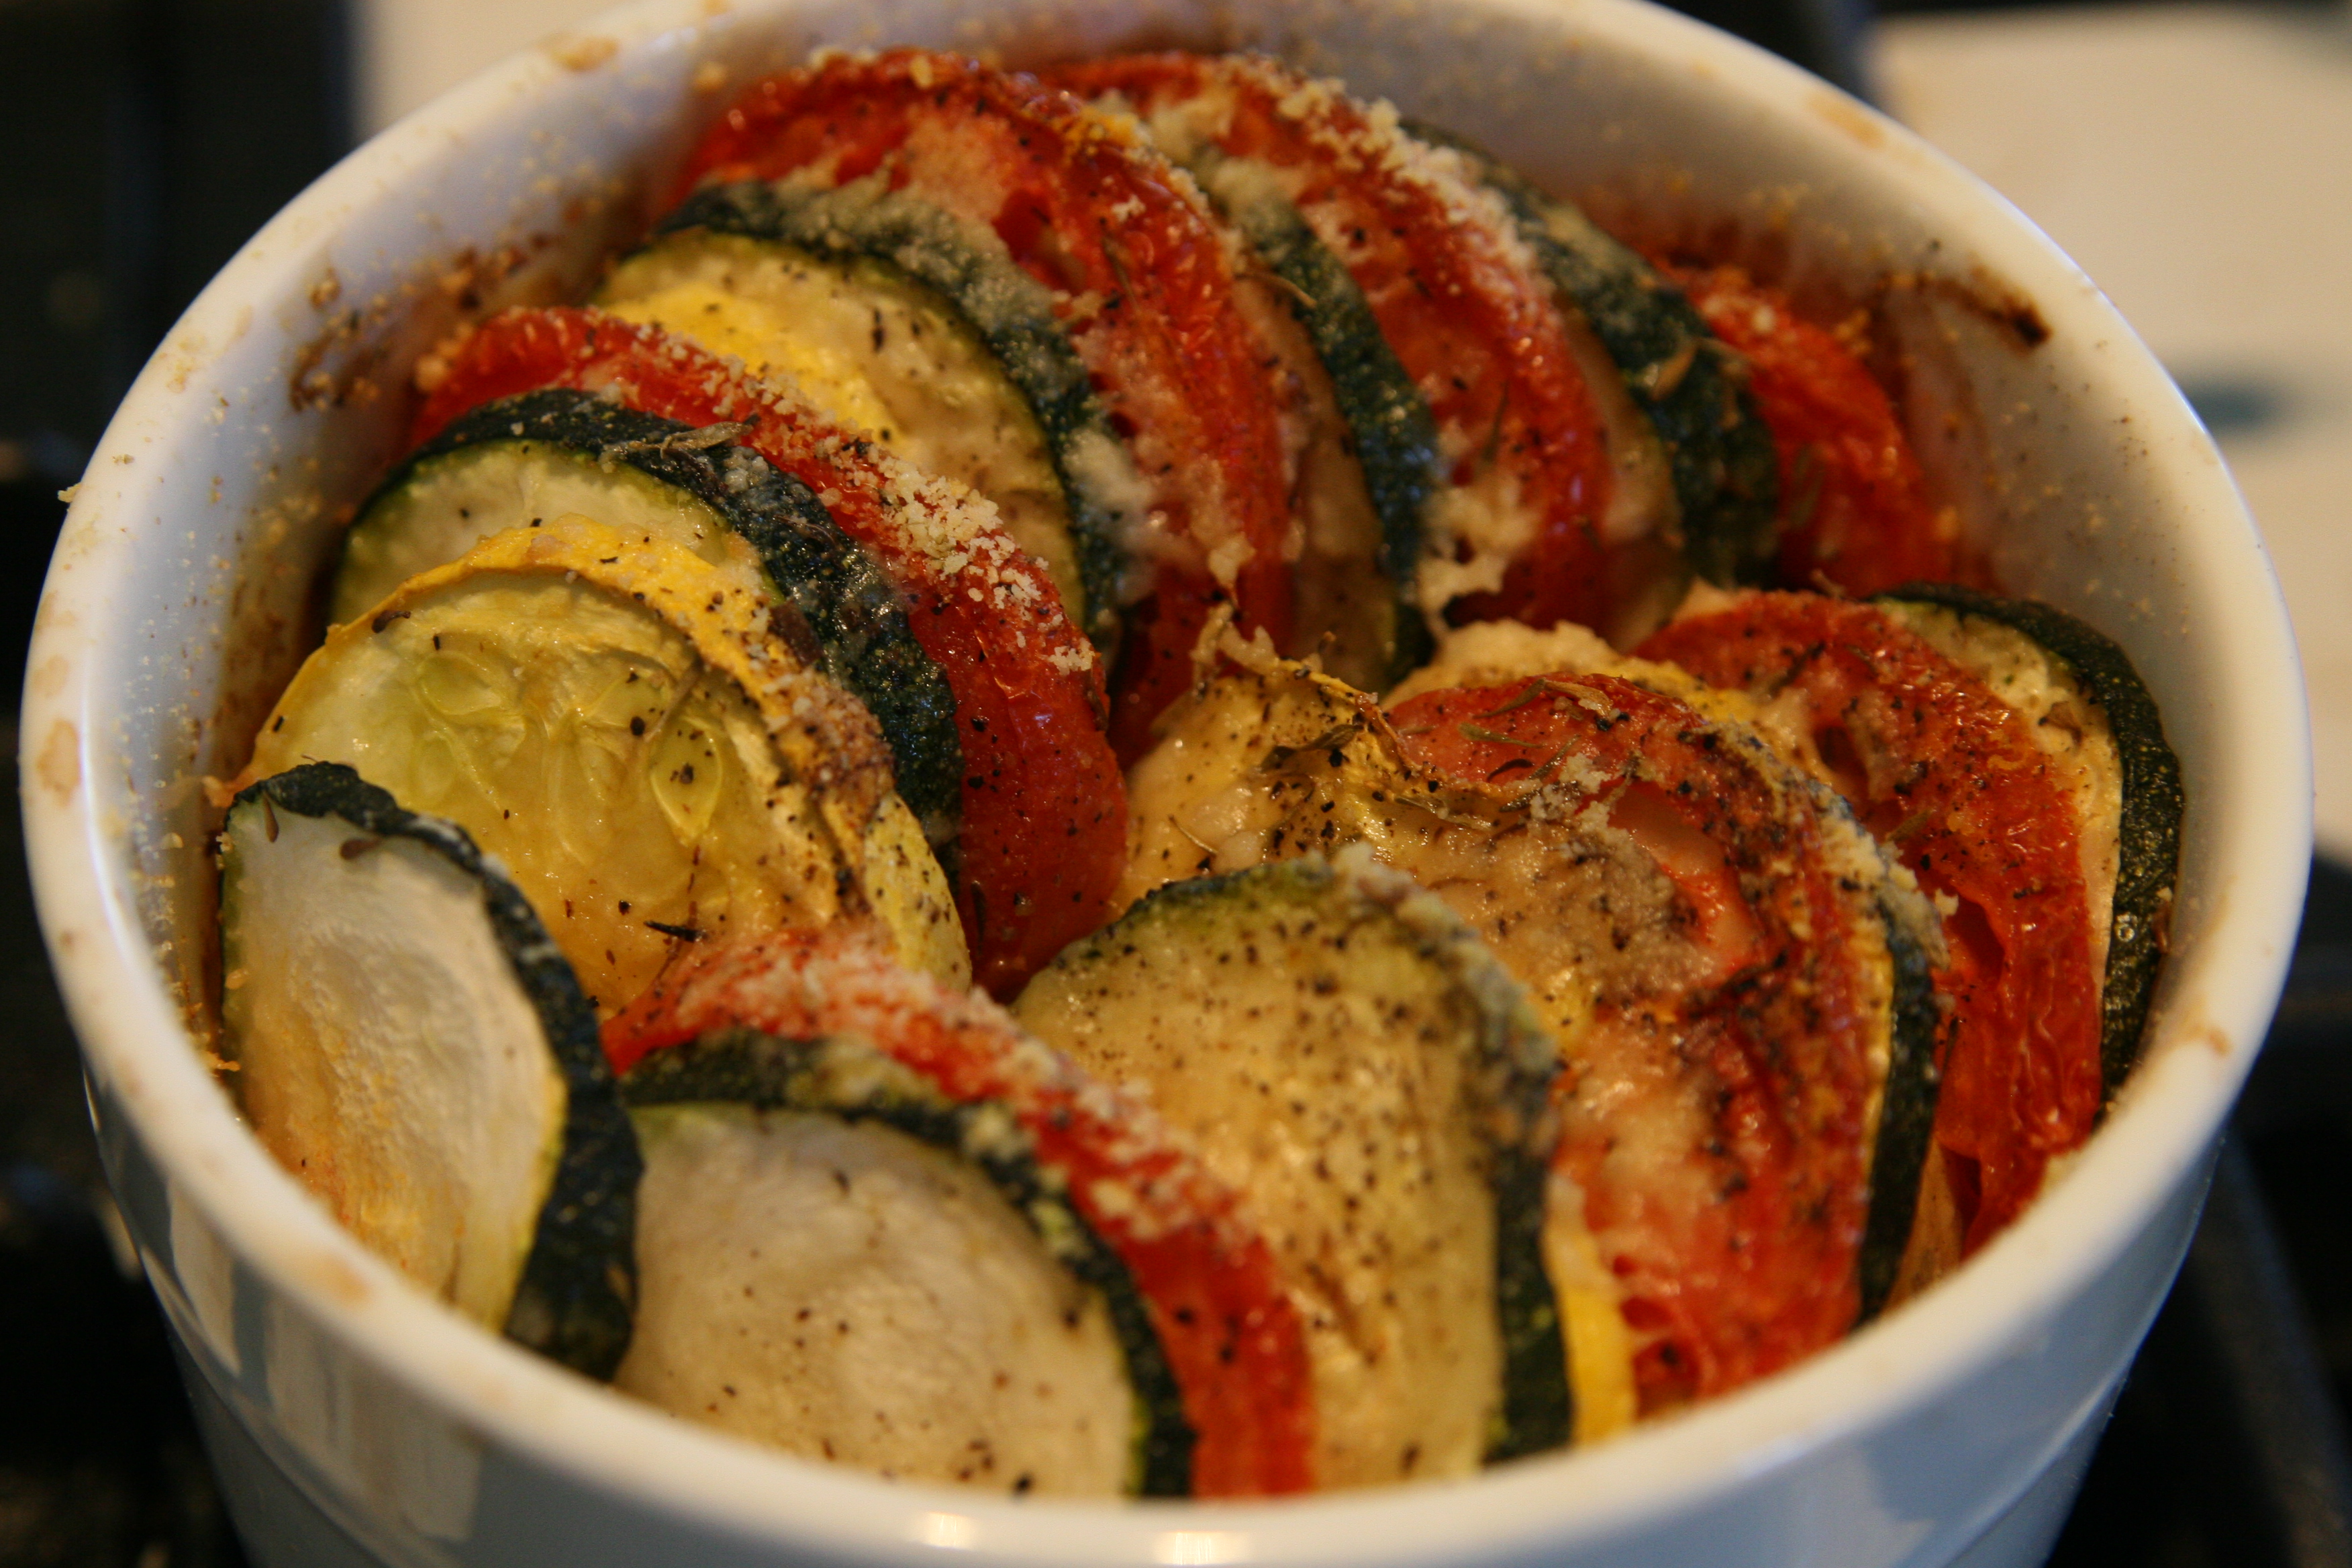
I put them back in the oven at 350 degrees for about 30 mins. (Just watch for the onions and tomato to brown up a bit and you’re good to go. I completely forgot to take a photo of them out of the oven because we were hungry and they smelled SO good.
For it being a quick thrown together kind of “side dish” (we both agreed this is good enough for a main dish very soon.) it was actually super yummy and filling. The kind of good that makes you ignore your chicken. :)

Rosemary Grilled Pork & Parmesan Kale Twice Baked Sweet Potatoes

IMG_2025
Since starting this whole "clean eating movement" in my own home, I have really pushed myself to try new things that I would have never tried before. Cauliflower!? Yuck..just eat broccoli if you have to. Kale!? The heck is that!? Baked potatoes? All the fixins please!!
I had the tastebuds of a toddler..
Above is a mix of veggies that I roast in the oven and now always ALWAYS have ready in the fridge. I can take 1/2 a cup and heat it up in a small frying pan (no oil needed) and once its gotten a little crunchy on the outside, and warm on the inside, I cook an egg over easy in the same pan and rest it on top for a DELICIOUS and one of my favorite breakfasts EVER. (And I love me some breakfast!) I can have it for a snack in some lettuce cups, I can eat it for lunch or dinner as a side..It is SO good..you will have trouble finding meals to not eat it with.
Anyways, I had some extra sweet potato (I prefer to have more zucchini/tomato/squash in the mix compared to sweet potato) so I decided to do a baked potato :) I wrapped the washed/dried sweet potato in some aluminum foil with some cooking spray inside, to keep the skin from mushing, poked a few holes in it with a fork and set it in the oven at 350 degrees for 1-2 hours. Once they are done cooking (my mom taught me to stick them with a steak knife and when it goes in smooth they are good to go) take them out of the aluminum foil and let them cool so you don't burn your finger tips clean off your beautiful hands.
I spooned out the insides of the sweet potato, leaving about 1/4 of an inch still inside to keep it's shape. In the bowl with the sweet potato innards (ha) I added 1/4 a cup of shredded parmesan cheese, a little salt & pepper, 1/4 a cup of non fat greek yogurt, and some kale chips I made earlier (see my previous blog entry with the recipe for KALE CHIPS here)
IMG_2028
After I mixed everything up really well (I like to leave a few larger sweet potato chunks just for consistency preferences but there's really no wrong way to mix it up.) I spooned them back into the potato skins and popped them back into the oven..
IMG_2032
While those were browning up on top I took the thin pork loin I marinated earlier (lean meat for $2.20!? I'm not too proud for clearance meat haha).. I had put them in a ziplock baggy with a tablespoon of olive oil, 1/2 a tablespoon of rosemary, and a little salt and pepper and let them sit in the fridge for about 30 minutes.
IMG_2027
Once I was ready to cook them, I heated up a grilling pan to med-high heat and cooked them until my handy dandy meat thermometer read 160 degrees.
IMG_2034
Due to my planning ahead, the pork and sweet potato skins were ready at the same time. At that point, I think we would have eaten them raw because the house smelled so good we were starving.
IMG_2036
Very very tasty & very very easy. What are you waiting for?? Get to eating! ;)

Blueberry Corn Meal Muffins

The other day Brandon was searching the kitchen for something sweet and since I had a snack time approaching, I decided I would try a recipe I saw on The Gracious Pantry for Blueberry Corn Muffins.
The recipe makes 12 muffins and calls for:
  • 1 3/4 cups organic corn meal (Organic is always best)
  • 1/2 cup whole wheat flour
  • 1 teaspoon baking soda
  • 1/4 teaspoon salt
  • 1 cup applesauce (Unsweetened)
  • 3 tablespoons honey
  • 1 tablespoons molasses
  • 1 egg
  • 1 cup Unsalted Almond Milk
  • 1/4 cup Coconut Oil
  • 1 1/2 cups frozen blueberries
I started by pre-heating the oven to 425 degrees and mixing up my dry ingredients first to get them incorporated well.
IMG_2015
Then, I added the wet ingredients and mixed it all up..
IMG_2017
I added the blueberries JUST before I spooned the batter into the muffin tins (that I sprayed with non stick coconut oil) to keep the batter from turning completely blue. You're always going to get some degree of color bleed when using frozen, but the less you move the fruit around, the less you will have.
IMG_2018
See? Not too much. :) Then I popped the bad boys in the oven for 10 minutes. (You want the tops to brown..)
IMG_2020
After letting them brown on top for about 10 mins, I took them out of the oven, covered them with some tin foil and popped them back in for another 10. If you don't cover with foil they WILL burn on top. This is what they looked like after the second round of 10 mins in the oven after I removed the foil..
IMG_2022
I transfered them to a baking rack to cool and then served them up for me and my littlest taste tester..
IMG_2023
IMG_2024
These were super yummy. The baby and I both loved them warm out of the oven but they were also good the next day..and the next :) The corn meal gives them a very interesting texture..it's like a little corn bread muffin with blueberries. Two things that I love rolled into one delicious, muffin sized package. What are you waiting for? Go eat!

Baked Kale Chips


I needed a quick snack today and wasn't in the mood for anything sweet so I decided to scroll through my pins for snack motivation..and I found one. Kale chips. Now, if you're not familiar with kale, head on over here and drink from the pool of knowledge.
I picked up some kale yesterday so I cut the ribs off, washed and dried it and got out some olive oil and sea salt. (I used olive oil in the place of my normal coconut oil because I..was..out? OK! I couldn't get the jar open!) Like I was saying, I washed & dried the kale..
IMG_1994
I used the whole bunch of kale so I split them up into 2 baking sheets then used 1tbs olive oil per sheet. After sprinkling that on, I tossed on just a little bit of salt since I'm not a huge fan and mixed it all over to make sure every piece of kale got some loving..
IMG_1995
Then into the oven at 275 degrees for 20 minutes (with a flipping at the 10 minute mark)
IMG_1997
So..how did they measure up after 20 minutes had elapsed? They were VERY yummy. crunchy, a little salty, a tiny bit chewy (the pieces that were covered a bit) but man they hit the spot.
IMG_1999
My beautiful step lovies went through a whole baking sheet full of them while they were doing their homework!
IMG_2002
IMG_2006

Everyone loved them..except for the baby..who came running when I asked if he wanted chips...and then ran away when he saw what I was offering yelling "THAT NOT CHIPS THAT SALAD!" Can't win 'em all.

Stuffed Chicken Breasts

After running the kids around all day, I completely forgot that I hadn't planned out a dinner. Instead of throwing together a salad and some veggies, I decided to cook up the chicken breasts I conveniently had in the fridge. (My past self knowing my future self would probably neglect my chef duties today.)
Now, I just threw in ingredients that sounded good to us/we had on hand but here it goes:
Ingredients (per chicken breast):
1 Boneless skinless chicken breast (Tenderized to about 1/4 an inch...I don't have one of these newfangled gadgets so I use a ziplock bag and a heavy pan)
1tbs Cream cheese (no it's not clean, but what the hubby wants, the hubby gets)
1-2tbs Mozzarella cheese (see above)
about 1/4 a cup of Spinach (washed & drained well...I squeeze mine between some paper towels to get the extra water out)
some salt and pepper & oregano to taste
1 Roma tomato cut in half
Directions:
I preheated my oven to 375 degrees and got to pounding those breasts. HA!
IMG_2007
Then I spread on my other fillings starting with cream cheese..
IMG_2008
Then the mozzarella and spinach.
IMG_2009
Then I rolled them up and laid them in a baking dish sprayed with some non stick cooking spray (I personally prefer the trader joe's coconut oil)
IMG_2010
Then I repeated the process for the hubbin and cut up two tomatoes so we could each have one..because they looked too good to share!
IMG_2011
I sprinkled the tomatoes with a bit of salt, pepper, and oregano..ahhhh tying in the flavors of the chicken. ;)
IMG_2013
After about 40 minutes I pulled these bad boys out of the oven and made myself a salad on the side and sat down to dinner.
IMG_2014
I'm not a huge fan of cream cheese so I think when I make this again I will probably skip it in mine or at least just spread on a little bit, but the chicken was super juicy and the filling was great ESPECIALLY when I mixed in the tomatoes. MMM. Go try it!

"Green" Smoothie


After waking up from an uninterrupted nights sleep all on my own rather than being slapped awake by a two year old tyrant in diapers, I decided I was going to treat myself to a yummy/fruity/easy breakfast to get my day going. A smoothie..DUH!
My smoothie choices were:
  • 2 cups of Almond Milk
  • 3-4 handfuls of Kale
  • 1 cup Blueberries & 1 cup Raspberries 
  • 1 small Banana
  • 2tbs Chia Seeds
IMG_1953
IMG_1960
I personally don’t like ice in my smoothies so I just blended that bad boy up as is.
When everything looked blended I poured it into my “sippy cup” and watched the final installment of the Real Housewives of Orange County that’s been hanging out on my DVR for a while. Why not rot my brain while cleansing my body right?
IMG_1961
All in all, the smoothie was really tasty. The ONLY complaint I had was that the kale didn’t blend enough and I ended up chewing more than I wanted towards the end..but honestly, that’s my fault for not blending it enough. I could 100% see slipping this to the kids and them having no clue that it was way good for them. 

Clean Eating Crockpot Bread


Today I decided I was going to try and make my own bread. I am so tired of having to drag myself to the store so the kids can have sandwiches for lunch when the bread is so processed and who knows what's really in it. I've never made bread in my life..not even in a bread maker so I was a little nervous I was going to be crafting a wheat rock..
The recipe makes about a 1.5lb loaf of bread (don't make any less..you'll be sad when it's gone) :)
You will need:
  • 1 1/4 cup of Unsalted Almond Milk
  • 1tsp Yeast
  • 1tbsp Coconut Oil
  • 3 cups Whole Wheat Flour
  • 2tbs Honey
  • 3/4tsp Salt
  • 1 small handful of Chia seeds, Oats, something to give the top a little something extra (You don't have to if you don't want to, but I like the added crunch.)
IMG_1964
IMG_1965
I was lucky enough to have a mixer my mother in law passed down when she upgraded (I'm a sucker for a freebie) so I tossed all the ingredients in the mixing bowl and set it to "Fold" until all of the dough came together. While gave it a minute or two to get settled, I grabbed my crock pot and turned it on the low setting.  
I line the bottom of my crockpot with tin foil, take 1tbsp of coconut oil and spread it on the tin foil then took my dough and placed it on the center of my coconut oil slip and slide..for bread.
I took a small handful of Chia Seeds..(you know I take care of you..if you haven't heard about the magical Chia Seeds yet, clicky here. ;) ) anyways..I just sprinkled the seeds on top to give my loaf a little extra crunch.
IMG_1967
Now I put the lid on and walked away for the recommended 1.5 hours...
Well, at the 1.5 hour mark my loaf was still pretty doughy in the middle. Now I'm not a baker, or even a chef..so my only un-educated guess would be that maybe the swaps I made caused a longer bake time? Long story short..my bread wasn't ready until around the 2.5 hour mark.
A little longer than what I expected..but the wait was SO worth it..
IMG_1974
IMG_1975
And a little look at the loaf all sliced up:
This bread is AWESOME. It was just a tad sweet from the honey..but not in a sweet bread kind of way..it was just delicious. It came out a little dense, but my younger brother said it reminds him of the bread they serve at Outback Steakhouse and I agree. My husband who hates wheat bread loved it! It was so easy and so tasty that it just might have taken out it's store bought distant cousins. :) Go try it!

Vegetable Tian


Guys......guys......I've been busy in the kitchen this morning as my two year old is wreaking havoc at my mom's house and my husband is working overtime. I've done research for a few blog posts (that will be coming soon) and was originally going to save this post for another day but it is SO good I can't even...I want to scream it from the top of Mount Rubidoux, but it's hot and I'm too lazy to hike to the top today.
Ah yes! The recipe! Today I decided that since my lovely husband is hard at work on a Saturday bringing home the "bacon" if you will..I would bring him a nice dinner so he didn't have to grab some fast food during his shift. After poking through my fridge I decided I would make some grilled chicken breast with vegetable tian by the fabulous Ina Garten. Now, I've seen many a pin with variations on this dish, but my favorite is just a tad different than the "original" and can be found at For the Love of Cooking.
For this recipe you will need:
  • 2tbs of Olive Oil (1 for sautéing & 1 to drizzle on top
  • 1/2 Yellow Onion (Diced)
  • 2 Cloves Garlic (Minced)
  • 1-2 Russet Potatoes (Unpeeled)
  • 1 Zucchini
  • 1 Squash
  • 3 Large Roma Tomatoes
  • Sea Salt, Pepper & Thyme to taste
  • 1/2 cup Parmesan Cheese
Mouth watering yet? First step is to dice the onion and sauté it in 1tbs of olive oil for about 8 minutes or until they are transparent. Once they are ready to go, add your two garlic cloves and let it go for another minute or so. Transfer the yummy mix that has certainly made your house smell gloriously nummy to your baking dish. (Make sure to spray some non-stick cooking spray in that bad boy so you can get all of the dish out later.)
IMG_1969
The recipe is for one baking dish, but I wanted something more individualized and pretty so I used my little ramekins..because...cute.
IMG_1971
                              
While the onions were cooking I was busy slicing up about 1/4 of an inch sections of my veggies. Now, I was just cooking two servings so I used 2 Roma tomatoes, 1 medium zucchini and 1 medium squash. INSTEAD of a few Russet potatoes, I opted to use 1 medium sweet potato. I am OB-sessed with these fantastic sweet and savory yums and they are stinking good for you too! You can learn more about the benefits of sweet potatoes here. But since The sweet potato was a tad large for my ramekins I just laid two slices of it on top of the onion & garlic mixture.
IMG_1972
Now you get to assemble the zucchini, squash and tomato in a circular pattern and drizzle that bad boy with your remaining tbs of olive oil.
IMG_1973
Don't forget the salt, pepper & thyme!
IMG_1976
Cover the dish (or in my case, dishes) with tin foil and bake at 375 degrees for about 30-40 minutes. After 30-40 minutes remove the tin foil and sprinkle with your 1/4 cup of parmesan cheese. *DROOL*
IMG_1982
Pop that back in the oven uncovered for another 25-30 minutes or until the potatoes are cooked through.
Let me take you on a little side trip before the unveiling...I said earlier I decided to make 2 cute ramekins full of tian goodness..remember? WELL..as I took #1 out of the oven (shortly after this photo..)
IMG_1986
I DROPPED THE DANG RAMEKIN!!!!! I was so bummed. It was comparable to when a child loses a balloon..
cry
The purest form of heartbreak.
After I wiped my tears and the floor of my kitchen, I pulled the surviving tian out of the oven CAREFULLY and set up a "to-go" dinner for the hubby.
IMG_1987
On the menu: Grilled chicken, vegetable tian, honeydew melon, and some clean eating crockpot bread I made this morning.
IMG_1993
Hope you like it babe! ;) See you soon!
As for today's workout..It's time to work on these guns!! Head over here to get some!!