Wednesday, October 30, 2013

Yia Yia's Greek Green Beans (Clean Version)

There have been so many changes in my life since I lost my Yia Yia to Pancreatic Cancer. I've gotten married to a man she would have loved, and had a son who will never know exactly how amazing she was first hand. People say that time heals all wounds, but even all these years later, I find myself sobbing uncontrollably when I think about not having her here.
One thing that I could always count on was that when I went to Yia Yia's house, I was going to eat..and I was going to eat SO GOOD. A Southern Greek woman with kitchen skills that would put any Food Network Chef to shame. There are times when I am feeling a little down, or not feeling well at all and that's when I love to crack open my recipe book and make something that my Yia Yia would have made for me. It makes me feel like maybe she's not so far away..like she never really left at all.

Wasn't she beautiful?

For this cleaned up recipe you will need:
2 to 2.5 Lbs Fresh Green Beans (Cut to about 1 inch long)
1 Large Yellow Onion (Chopped)
1 Tbs. Minced Garlic
1 Tbs. Olive Oil
2-3 Large Tomatoes (Diced and crushed) - Yia Yia used 1 Can of Contadena Crushed Tomatoes
1/2 Tbs. Oregano
2 Bay Leaves
Salt & Pepper to taste
In a medium to large pan, heat up the garlic and onion in the olive oil over medium-high heat. Once the onions are more of a clear color and have softened up, add the green beans, oregano, salt and pepper and tomatoes. Mix the ingredients to blend them together and add your bay leaves to the pot. You're going to need to take them out before you eat later so I always try and keep them peeking out just a tad so they are easy to find later. Bring to a low boil then lower the heat to juuuuuust a simmer. Cover and simmer for 45 mins. 

Now, I apologize for the terrible phone picture, but I have been having camera difficulties lately, thus the lag in posts. Things should be up and running again soon though. 


As for nutritional information, please note that this is just an estimate. The nutritional value of your pie will vary depending on the ingredients you choose & portions you add. It should be used as a guide and not a definite. Happy eating loves!

Monday, October 21, 2013

No Bake Vegan & Clean Eating Pumpkin Cheesecake

For some people, finding ways to eat clean is a chore. For me, it is something I love and couldn't imagine going back to filling my body with all the extra garbage it was being bombarded with before I made the change in my kitchen. Eating vegetables that were on the vine that morning, eating lean meats that were grass fed, and eating the freshest and most delectable fruits I've ever eaten makes me happier than I should admit, but as with any eating habits, I've had to be careful of the "little traps." Now, I don't mean traps as in I have to watch my step ever so carefully as to not set off some sort of net covered with leaves that will swoop me off my feet while I blindly eat a carrot. The "traps" I'm speaking of are the ones I struggle with as far as my eating habits go. The "But it's health food..I can eat more of it right?" or "Almonds are good for you..I'm just going to eat this almond butter out of the jar" type stuff. Yes, these foods are clean, and are indeed healthy, but too much of a good thing my dear...this isn't to say that you shouldn't indulge. Hell, live a little. Want some real deal PSL on your weekend? You deserve it! It's your brother's birthday? Save me a piece of cake! I indulge every now and again, but I have had to train myself to be mindful of my portion sizes and keep to my snack times as to not go "nuts", excuse the bad pun, when it comes to a handful of dark chocolate covered almonds. A few, sure! A bag? Stop it!
One of my brother's favorite desserts, if not all time numero uno, is pumpkin pie cheesecake. EEEVERY year this kid, I say kid and he's 25 this year ugh..I'm getting old, anyways..every year his birthday request is not a Spiderman cake or some sort of three tiered Cake Boss creation; Instead, he requests a pumpkin pie cheesecake. Anytime I see a pumpkin pie cheesecake, I instantly think of my less funny and far less attractive (Sorry Josh, my blog my rules.) not so much younger brother o-mine. This recipe is for you.

For this recipe you will need: 

PIE
3/4 Cup Pumpkin Puree
1/2 Cup Almond Butter
1/2 Tsp Pumpkin Pie Spice
Pinch of Salt
3 Packets of Stevia in the Raw
1 Tsp. Vanilla Extract
2 Tbs Maple Syrup (Agave will work also)

Crust
1 Cup of Pitted Dates
3/4 Cup Walnuts & 1/4 Cup Set Aside for Topping
1 Cup Shredded Unsweetened Coconut
1 Tsp. Vanilla Extract


This recipe could not be any simpler I promise. First off, you are going to take all of the pie ingredients, yup every last one of them, and throw..no..pour them gently into a food processor. Turn that bad boy on and let it go for about a min. Take the top off and push the mix that has tried to escape up the sides down towards the bottom and turn it on again just until it incorporates also. Pour the mix into a mixing bowl and set aside.

Now you're going to take all of the crust ingredients & gently pour them into the food processor. Turn it on again until everything gets chopped up nicely. You're going to want to see pieces of date and coconut and walnut..You're not making a paste. I decided to put my crust into a spring form cheesecake pan, but you can put it in anything you like. Now...push the crust down flat so that it is even (you don't want one side to be all crust and one side to be all pie filling. Once you've mashed it down to an even layer, top the crust with the pumpkin pie filling and spread it evenly over the top. Cover it with some plastic wrap and let it sit in the freezer overnight. Transfer it to the fridge about an hour before serving and you're good to go. 

Now, the moment you've all been waiting for...the reveal...


As for nutritional information, please note that this is just an estimate. The nutritional value of your pie will vary depending on the ingredients you choose & portions you add. It should be used as a guide and not a definite. Happy eating loves!


Saturday, October 19, 2013

Clean Eating Pumpkin Chocolate Chip Cookies

I love this time of year. It's time for decorative Cinnamon Broom Sticks at Trader Joes, time for cuddling by the fire, time for sweaters, boots, and all of my favorite things. I decided that tonight was time for pumpkin cookies, and who am I to tell myself no?

For this recipe you will need:

1 Cup Pumpkin Puree
1/3 Cup Agave Nectar
1/2 Cup Coconut Oil (Melted..this is important)
1 Large Egg
2 Cups Whole Wheat Flour
1 Tsp Baking Soda 
2 Tsp Baking Powder
1 Tbs Cinnamon
1/2 Tsp. Nutmeg
1/4 Tsp Salt
1 Tbs Pure Vanilla Extract
1 Cup Chocolate Chips

In my mixer, I added the pumpkin puree, agave nectar, and coconut oil. I mixed them together until they were blended well and THEN added the egg and vanilla extract. The coconut oil will harden as soon as it comes in contact with something like a cold egg, but if you blend it in BEFORE adding the egg, it'll keep smooth and you won't end up with chunks of coconut oil in your cookie. :) 
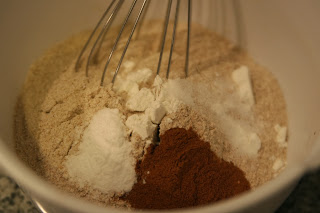
In another bowl, I added the wheat flour, baking soda, baking powder, cinnamon, nutmeg and salt. I whisked them together to get them all mixed up.
Then I poured my flour mix into my wet pumpkin mix and turned on my mixer. 
It didn't take long to mix the dry and wet ingredients, I just used a plastic spatula to push the batter that wanted to escape up the sides back towards the center and it came out nicely.
Then I added my chocolate chips. MMM. At this point, you can add walnuts, raisins, cranberries, anything! I went simple and just did chocolate chips this time. 
Fold the chips into the batter..
I used my tbs measuring spoon as a cookie scooper and got 29 cookies from the batter :)
The batter won't spread much AT ALL. The cookies are fluffy and almost cake like. I put them in the oven at 350 degrees for 10 minutes. (They just start to brown on top)
See. Fresh out of the oven.
I poured myself a little drink of almond milk and grabbed a couple cookies for myself. 
A chocolate chip cookie fresh out of the oven is JUST what I needed. 

As for nutritional information, please note that this is just an estimate. The nutritional value of your meal will vary depending on the ingredients you choose & portions you add. It should be used as a guide and not a definite.


The cookies weren't really pumpkin...y? The pumpkin was more as a fluffer for the cookie. You get a hint of the pumpkin pie type spices and then the creaminess of the chocolate chips...just....comfort treat for sure. I hope you guys enjoy them as much as I did! Happy eating loves!


Friday, October 18, 2013

Clean Eating Shrimp Tacos With Cabbage, Onions, & Chipotle Cream Sauce


As a stay at home mom, there are little to no days where my husband and I can sit down and have a nice dinner with just us two. Luckily, this weekend our 3 year old is camping with my mom and my 3 step babies are at their mom's house so I decided to make a celebratory meal for just the two of us. Seeing as how one of my FAVORITE cheat meals is usually Rubio's Fish Tacos, I decided I would clean it up and make tacos for us.

For this recipe you will need:

For the Tacos:
10 oz. Medium Raw Shrimp (Peeled & Deveined)
1 Medium Sweet Onion Sauteed in 1 Tbs Coconut Oil
1/4 Small Red Cabbage (Finely Chopped)
1/2 Tbs Olive Oil
Pinch of Salt
Pinch of Pepper
1-2 Tsp Paprika
Juice of 1/2 Lime
Corn Tortillas

For the Chipotle Sauce:
1 Cup Greek Yogurt
1 Tbs. Chipotle in Adobo
1 Tsp Lime Juice
1 Tsp Pepper
1 Tsp Salt

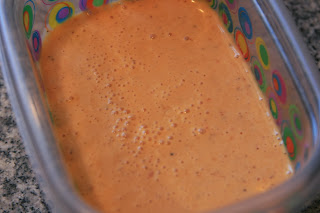
I started with the Chipotle Sauce. I put all of the ingredients into a food processor and blended it until it was all smooth.
 Do you like my fancy container? The husband and I call our paper plates and plastic containers "Fine China." To be honest, if it wasn't for photographic appeal, most of the meals I prepare would be on "fine china." With 4 kids, it's easier. :) ANYWAYS, this stuff is SPICY. We love spicy, but if you are going to be feeding this recipe to little ones, make sure you taste it first. You can add less chipotle, or add more greek yogurt, but this was perfect for us. (And it made a ton)

Once the sauce was in the fridge to set a little bit, I chopped up 1/4 of my cabbage and set it aside. Then I chopped up my onion and sautéed it in 1 Tbs of coconut oil. (Didn't take a pic of that sorry!)
While my onion was being sautéed, I tossed my shrimp in 1/2 Tbs of olive oil, the juice of 1/2 a lime, a pinch of salt, pepper, and 1 Tsp of paprika. I cooked the shrimp over high heat for about 3-5 mins. They turn a pink/orang-ish color when they're done.
I also picked up some canned black beans to make my life easier and because I love beans. To make them taste less like canned beans and more like homemade, I added 2 cloves minced garlic and 1 tsp of oregano, a pinch of salt and pepper. It was a nice way to put the fire out from the chipotle sauce on the tacos ;)
Here are my little tacos all assembled. I used about 1/2 Tbs. of Sauce on each taco and it was just enough. The tacos were spicy, and crunchy, and the sweet onion was such a nice addition to them. As a thank you for the dinner the hubby took me out for a walk around Trader Joes & some Frozen Yogurt. :) I'm a lucky, lucky lady. Hope you guys enjoy!


As for nutritional information, please note that this is just an estimate. The nutritional value of your meal will vary depending on the ingredients you choose & portions you add. It should be used as a guide and not a definite. The following is for the taco (excluding the tortilla)
TACOS


Wednesday, October 16, 2013

Clean Eating Zucchini Bread

I'm one of those people who is just a walking carb. I love bread. I love it so much. I would marry it if I could walk around with a bagel, hand in hand, and not have people cross the street when they see me, or shield their child's eyes. Anyways, when I am having one of those days when I just need to feed that carb lover in me, I usually reach for something baked and just a tad sweet. This week, I decided zucchini bread would fill that void. 

For this recipe you will need: 
2 Cups of Whole Wheat Flour
1/2 Cup of Nonfat Greek Yogurt
1 Medium Banana (Mashed)
1 1/2 Cups Zucchini (Grated)
2 Eggs
2 Tsp Cinnamon
1 Tsp Vanilla Extract
1/3 Cup of Sweetener (Agave..Maple Syrup..Honey) I used a combination of Honey and Maple Syrup to fill the 1/3 cup
1 1/2 Tsp Baking Powder
1 Tbs Chia
1/4 Cup Walnuts
Pinch of Salt

First you're going to mix the: Yogurt, Mashed Banana, Zucchini, Eggs, Vanilla & Sweetener (In my case 1/3 cup of a honey & maple syrup mixture) and mix mix mix until its all incorporated.
 
In another mixing bowl, add your: Flour, Cinnamon, Baking Powder, Chia, Walnuts & Salt and mix again..
 Now you get to mix the two mixes into one mix. Still with me? ;) 
 Now you get to make a choice: 1 big ol' loaf of zucchini bread goodness, or 2 smaller loaves. I made 1 big loaf because...just because I was too tired to find another bread pan HA! Make sure you spray the pan with some non stick cooking spray. 
 Pop this little guy in the oven at 375 Degrees for 50-60 mins. Check it at 50 and if you can put a toothpick in and it comes out clean, you're good to go. 


YUM
 YUM
 YUM

As for nutritional information, per www.myfitnesspal.com, the following was my results. Please note that this is just an estimate. The nutritional value of your meal will vary depending on the ingredients you choose & portions you add. It should be used as a guide and not a definite. Happy eating loves!

                                    Calories           Carbs         Fat       Protein     Sodium      Sugar

Total:1,71631737602,200106
Per Serving:13224351698


Monday, October 14, 2013

Clean Eating Butternut Squash Casserole

I will be the first to admit that my palette would tends to be comparable to my 3 year old who constantly requests quesadillas and peanut butter & jelly sandwiches. Before my weight loss surgery, I didn't eat many...ok...I never ate veggies. Butternut squash was not only something new I wanted to cook with, but to be honest, it was a new taste for me as well. 

For this recipe you will need:
1 Butternut Squash
1 Sweet Yellow Onion (Chopped)
2 Tbs. Coconut Oil
3 Cloves Garlic (Minced)
1 Piece toasted bread (I used some leftover Clean Eating Crockpot Bread)
Optional:
Ground Cinnamon
1 Cinnamon Stick


 First thing I did was cut the Butternut Squash in half from top to bottom. 
 After Spooning out the seeds & putting the halves in a baking dish, 
 I put about 1-2 inches of water in the bottom of the pan, threw in a cinnamon stick, and sprinkled the squash with some fine cinnamon also.
 I grabbed the leftover Clean Eating Crockpot Bread I had and crumbled it into a baking pan. Toasted it at 350 until it started to brown up a bit. (about 5-10 mins maybe?)
 After I pulled my toasted bread crumbs out of the oven, I put my Butternut Squash in and let them go for about an hour.
Once they were cooked through, I let them cool and spooned out the insides tossing out the skins.
In a pan, I heated up 2 tbs. of Coconut Oil, added my Garlic and JUST before it started to brown, I added my onions until they were transparent.
Then, I mixed the Garlic/Onion Mixture into my Squash.
..Topped it with my bread crumbs & put it back in the oven for about 25-30 mins.
I served it up with some Cinnamon Creamy Chicken (that I will post the recipe for later) and a Kale salad with some walnuts, dried cranberries & a little italian dressing. 

As for nutritional information, per www.myfitnesspal.com, the following was my results. Please note that this is just an estimate. The nutritional value of your meal will vary depending on the ingredients you choose & portions you add. It should be used as a guide and not a definite. Happy eating loves!
  
              
                                              Calories         Carbs        Fat       Protein     Sodium   Sugar
Total:602932892633
Per Serving:100165246